There are so many designing tasks that can be either automated or expedited, and save you hours spent doing manual designing tasks. So if you are a designer looking to optimize their workflow, this is the right resource for you. Save the link for this blog in your notes as we are going to be talking about some of the best and yet completely FREE the Adobe Illustrator plugins that can drastically reduce tedious tasks, automate repetitive processes, and allow you to expand new creative possibilities.
This has eight best Adobe Illustrator plugins that address specific pain points in the design process. Each of these tools has a unique use case that can save you hours of work and enhance your creative output.
So let’s get started
Table of Contents
Getting your toolkit ready: What you need to know
Before getting into these plugins, let’s make sure you have everything needed to get the most from these tools. Setting up properly now will save you potential frustration later.
- Adobe Creative Cloud subscription: Most plugins require an active Creative Cloud subscription. Your subscription level (Individual, Team, or Enterprise) may affect plugin availability and installation methods.
- Updated Illustrator version: Plugins are designed for specific versions of Illustrator. For optimal compatibility and performance, ensure you’re running the latest version (or at least one released within the last two years).
- Admin privileges: Some plugins require administrator privileges on your computer for installation. This is particularly important for team environments with managed IT systems.
- Plugin management familiarity: Learn to navigate to Window > Plugins in Illustrator, as this is your hub for managing all installed plugins.
- Storage space: Some plugins, especially those with extensive libraries or assets, may require significant disk space.
Now that you’re properly equipped, let’s explore the plugins that can transform your Illustrator workflow.
08 FREE Adobe Illustrator Plugins to streamline your current workflow
1. Arranger

Arranger solves one of the most time-consuming aspects of working with multiple objects in Illustrator: precise organization and distribution. While Illustrator includes basic alignment tools, Arranger takes this functionality to a new level with intelligent object arrangement, quick grid creation, and advanced distribution options. It’s specifically helpful for creating complex patterns, organizing design elements, and maintaining visual harmony across artboards.
If we talk about the UX, the plugin has a clean, intuitive interface with visual icons that clearly demonstrates different arrangement options. Most designers can easily learn these functions within 15-20 minutes of experimentation or a beginner-level YouTube tutorial. The more advanced features like randomization and custom spacing patterns might take a bit longer to get a grip, but the core and basic functions are immediately accessible.
Key features:
- Smart grid creation – Generate perfectly spaced grids of objects with customizable rows and columns
- Randomization tools – Add natural variation to object placement while maintaining overall structure
- Circular arrangement – Distribute objects evenly along circular paths with adjustable radius
- Gap control – Set precise spacing between objects in any arrangement pattern
- Selection memory – Save frequently used arrangements for quick application to other object groups
Here’s how you can add Arranger into your toolkit:
- Go to the Adobe Exchange marketplace and search for “Arranger”
- Click “Get” and sign in with your Adobe ID if needed
- Launch Illustrator or restart it if it’s already open
- Go to Window > Extensions > Arranger
- The panel can be docked alongside your other frequently used tools for easy access
Time-saving impact: Using Arranger, designers can easily reduce complex object arrangement tasks from minutes to seconds, especially when working with dozens or hundreds of elements.
2. QR Code Maker

QR Code Maker allows designers to create fully customizable, vector-based QR codes directly within Illustrator. No more exporting QR codes manually! This function has become a favorite among packaging designers, marketing materials creators, and anyone who needs to incorporate scannable codes into their designs. The plugin generates vector QR codes that remain scannable while allowing for creative customization—something not possible with imported bitmap QR codes from external generators.
The plugin’s interface is refreshingly straightforward with a three-step process: enter your content (URL, text, or contact information), customize the appearance, and generate the code. Even designers new to QR codes can be up and running in under five minutes, with helpful tooltips explaining each setting. The live preview function allows for immediate testing, making the learning process virtually painless.
Key features:
- Vector output – Creates fully scalable QR codes that maintain scan functionality at any size
- Color customization – Apply brand colors to foreground and background elements
- Design variations – Choose from rounded, square, or custom corner styles for unique looks
- Error correction levels – Set tolerance for damage or design overlays while maintaining scannability
- Direct export – Save generated codes in multiple formats without additional steps
Here’s how you can add QR Code Maker into your toolkit:
- Visit the Adobe Creative Cloud marketplace
- Search for “QR Code Maker” and select the official plugin
- Click “Install” and follow the authentication prompts
- Restart Illustrator if it’s currently running
- Find the plugin under Window > Extensions > QR Code Maker
- The floating panel can be docked for easier access during regular use
Time-saving impact: Eliminates the need to switch between QR generation websites and Illustrator, saving approximately 10-15 minutes per QR code creation.
3. Artboard Resize

Artboard Resize streamlines one of the most common tasks in multi-format design: creating and managing different sized artboards. Whether you’re designing for various social media platforms, print formats, or device screens, this plugin allows you to instantly apply standard sizing presets or create custom dimensions. It also includes intelligent scaling options that maintain design integrity when resizing, preventing distortion of your work.
With its minimal, function-focused interface featuring clearly labeled preset buttons and custom input fields, you’ll be up and running almost immediately. Most designers grasp the full functionality within 2-3 minutes of use since the plugin employs familiar concepts and terminology that even Illustrator beginners can understand. The batch resize function—which allows multiple artboards to be adjusted simultaneously—is particularly valuable for multi-platform projects.
Key features:
- Pre-loaded dimensions – Includes standard sizes for print, web, social media, and mobile platforms
- Custom presets – Save your frequently used dimensions for quick access
- Batch resize – Apply changes to multiple artboards simultaneously
- Proportional scaling – Maintain aspect ratios of content when resizing
- Centered content option – Automatically center existing design elements when resizing
Here’s how you can add Artboard Resize into your toolkit:
- Navigate to Adobe’s plugin marketplace or Exchange portal
- Search for “Artboard Resize” and select the plugin
- Click the “Install” button and authenticate with your Adobe ID
- Once installation completes, restart Illustrator
- Access the plugin via Window > Extensions > Artboard Resize
- Keep the compact panel open during your design process without consuming excessive screen space
Time-saving impact: Reduces the time needed to set up multiple format variations by up to 80%, turning a 20-minute task into a 4-minute one.
4. Colorist

Colorist revolutionizes color management in Illustrator by providing advanced color scheme generation, palette management, and color harmony tools. It helps designers create cohesive color schemes based on color theory principles, extract palettes from images, and apply consistent color themes across complex designs. For brand identity work and color-critical projects, Colorist eliminates guesswork and ensures harmonious results.
The plugin features a visually rich interface with color wheels, harmony visualizations, and sample palettes that make color exploration intuitive and engaging. Basic color scheme creation feels natural from the start, though mastering advanced features like custom harmony rules and color extraction settings might take 30-45 minutes of exploration. Fortunately, the plugin includes interactive tutorials that help flatten the learning curve, and the visual nature of the interface makes experimentation enjoyable rather than frustrating.
Key features:
- Color harmony generation – Create complementary, analogous, triadic, and custom color schemes with one click
- Image extraction – Pull color palettes directly from reference images or photographs
- Accessibility checker – Verify color combinations meet contrast requirements for accessibility standards
- Export options – Save color schemes as ASE files, CSS variables, or design tokens
- Trend integration – Browse current color trends and seasonal palettes for inspiration
Here’s how you can add Colorist into your design arsenal:
- Open Illustrator and navigate to the Plugins menu in the top navigation
- Select “Browse Plugins” to open the Adobe Creative Cloud plugins marketplace
- Search for “Colorist” and click on the plugin listing
- Click “Install” and wait for the installation to complete
- Restart Illustrator to ensure proper installation
- Access the plugin through Window > Extensions > Colorist
- The panel can be docked alongside your color swatches for easy reference
Time-saving impact: Reduces color scheme development time from hours to minutes while producing more harmonious and theoretically sound results.
5. Stock Solo

Stock Solo brings Adobe Stock’s vast library directly into your Illustrator workspace, eliminating the need to switch between applications or websites when searching for and incorporating stock assets. The plugin allows you to search, preview, and place stock images, vectors, and illustrations without disrupting your creative flow. For designers who regularly incorporate stock elements, this integration dramatically streamlines the asset acquisition process.
The interface thoughtfully mimics the familiar Adobe Stock web experience, making it immediately approachable for anyone who has used Adobe Stock previously. The search functionality, filtering options, and preview features operate just like the web version, allowing for a seamless transition. Most designers can comfortably use the basic search and insert functions within minutes, while the advanced filtering and licensing management features become intuitive with regular use.
Key features:
- Integrated search – Find the perfect asset without leaving your Illustrator workspace
- Preview mode – Try watermarked images in your design before purchasing
- Similar results – Discover related images based on your current selection
- License management – Track your licensed assets directly in the plugin
- Direct placement – Insert assets directly into your document at your preferred size
Here’s how you can add Stock Solo into your design arsenal:
- Open Illustrator and click on the “Plugins” panel in the right sidebar
- Click “Browse Plugins” at the bottom of the panel
- In the plugins marketplace, search for “Stock Solo”
- Click “Install” and sign in with your Adobe ID if prompted
- Once installed, you can find it by going to Window > Extensions > Stock Solo
- For faster access in future sessions, pin the panel to your workspace
Time-saving impact: Eliminates the need to switch between Illustrator and a web browser, saving approximately 2-3 minutes per stock asset search and insertion.
6. EAN 13 Barcode Generator
The EAN 13 Barcode Generator is essential for packaging designers and product graphic creators who need to incorporate standards-compliant barcodes into their designs. This specialized plugin produces vector-based EAN-13 format barcodes that remain scannable while allowing for color adjustments and size modifications within required parameters. It ensures that your packaging designs include technically correct barcodes that will function properly in commercial environments.
The plugin’s minimal, task-specific interface focuses on entering the correct numeric code and setting appropriate dimensions. Almost anyone can generate their first valid barcode within minutes of installation thanks to helpful validation features that prevent incorrect code entry. The documentation clearly explains minimum size requirements for scan compatibility, making it accessible even to designers with no prior barcode experience.
Key features:
- Auto-calculation – Automatically calculates the check digit based on your 12-digit input
- Vector output – Creates fully scalable barcode graphics that maintain scan compatibility
- Size validation – Prevents creation of barcodes that would be too small to scan reliably
- Color options – Change colors while maintaining the necessary contrast for scanning
- Standard compliance – Ensures barcodes meet GS1 specifications for global compatibility
Here’s how you can add EAN 13 Barcode Generator into your design workflow:
- Visit the Adobe Exchange or Creative Cloud marketplace
- Search for “EAN 13 Barcode Generator” and select the official plugin
- Click “Install” and authenticate if required
- After installation completes, open or restart Illustrator
- Find the plugin in the Window > Extensions menu
- Enter your 12-digit code (the 13th digit is automatically calculated)
- Adjust size parameters within the recommended guidelines
- Click “Generate” to create your vector barcode
Time-saving impact: Eliminates the need for third-party barcode generation services, saving both time and potential licensing fees.
7. Nimbling Clippers

Nimbling Clippers transforms the way designers work with clipping masks in Illustrator, providing advanced creation, editing, and management tools for this essential technique. While Illustrator’s native clipping mask functionality is powerful, Nimbling Clippers streamlines complex operations like batch mask creation, non-destructive editing, and mask visualization. For designers who work extensively with masked elements—especially in detailed illustrations or complex layouts—this plugin can save countless hours of tedious work.
The plugin features a focused interface with clearly labeled buttons for different masking operations that builds on familiar Illustrator concepts. Basic masking operations feel intuitive from the start, though you might spend 20-30 minutes exploring the advanced batch processing and mask management features with the help of the documentation. What sets this plugin apart is its visual indicators that help clarify which objects are masks and which are content, making the sometimes confusing concept of clipping masks much more accessible.
Key features:
- Mask visualization – Highlights mask paths with color coding for easier identification
- Batch masking – Apply the same mask to multiple objects in one operation
- Live preview – See the effects of mask adjustments before applying them
- Mask library – Save frequently used mask shapes for reuse across projects
- Non-destructive editing – Modify masking objects without breaking the mask relationship
Here’s how you can add Nimbling Clippers into your design workflow:
- Visit Adobe’s Creative Cloud desktop app
- Click on the “Plugins” tab and search for “Nimbling Clippers”
- Click “Install” and wait for the download to complete
- Launch Illustrator (or restart it if already open)
- Create or open a document with objects you want to mask
- Access the plugin through Window > Extensions > Nimbling Clippers
- Pin the panel to your workspace for easy access during masking-intensive projects
Time-saving impact: Reduces complex masking tasks from hours to minutes, particularly when working with designs that incorporate dozens of clipping masks.
8. Pantone Connect

Pantone Connect bridges the gap between digital design and physical production by providing direct access to the complete Pantone color libraries within Illustrator. This integration is crucial for designers working on projects that will be physically produced, as it ensures color accuracy throughout the design-to-production pipeline. The plugin allows you to browse, search, and apply Pantone colors while accessing important information about color matching, alternative palettes, and color compatibility across different materials and printing processes.
The professional interface resembles physical Pantone color guides, bringing familiarity to designers accustomed to traditional color matching. While basic color selection is straightforward, the full power of the plugin—including color harmonies, trending colors, and cross-reference features—rewards those willing to invest a bit more time exploring its capabilities. The plugin is designed for color-critical professional work, prioritizing precision and comprehensive information, but helpful guided tours and tooltips make the learning process smoother.
Key features:
- Complete color libraries – Access the full range of Pantone color systems including Plus, Fashion, Home, and more
- Cross-reference tools – Find the closest matches between different Pantone systems
- Digital-to-physical conversion – Translate RGB/CMYK values to their closest Pantone equivalents
- Trend forecasting – Browse color trend data and seasonal palette recommendations
- Direct application – Apply Pantone colors directly to selected objects with proper color settings
Here’s how you can add Pantone into your design workflow:
- Visit pantone.com/products/digital-apps/pantone-connect and create an account
- Download the Pantone Connect plugin for Adobe Creative Cloud
- Open the Creative Cloud desktop app and go to the “All Apps” section
- Find the Pantone Connect extension and click “Install”
- Launch Illustrator and navigate to Window > Extensions > Pantone Connect
- Sign in with your Pantone account credentials
- The panel will load with access to all available Pantone libraries
Time-saving impact: Eliminates the need to manually convert between screen colors and Pantone specifications, potentially saving hours of back-and-forth with print providers.
How to maximize your plugin workflow?
To get the most from these powerful plugins, consider integrating them strategically into your design process:
- Start with organization: Begin projects by setting up properly sized artboards with Artboard Resize, establishing a solid foundation for your design.
- Build your color foundation: Use Colorist and Pantone Connect early in the process to establish a strong color strategy before detailed design work begins.
- Optimize your arrangement phase: Once you have individual elements created, use Arranger to quickly organize them into cohesive layouts and patterns.
- Apply technical elements strategically: Add QR codes and barcodes with their respective plugins after the creative design is largely finalized, ensuring they remain scannable while fitting your design aesthetic.
- Streamline asset incorporation: Use Stock Solo throughout the process when you need to supplement your design with stock elements, without breaking your creative flow.
- Perfect with masking: Apply Nimbling Clippers in the refinement phase to create sophisticated masking effects that give your design depth and polish.
What’s next?
So now, you have cut down up to 30% design manual work and saved loads of working hours that can be directed to create more impactful and creative work. But there’s still one mistake you’re making that can cost up to 10+ hours per week, sucks on your creative energy and significantly reduces the creative output of your designs.
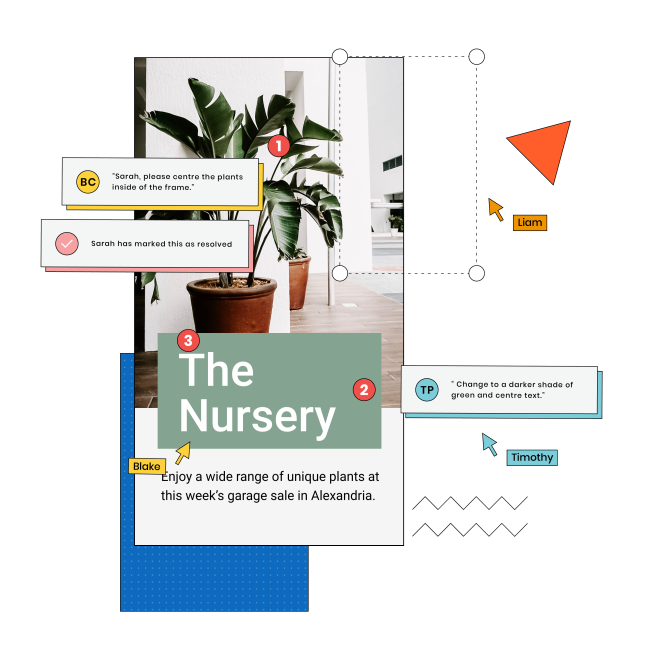
It’s feedback loop. Sprinkes Media’s latest whitepaper says
Designers spend almost 40% of their time iterating designs based on team feedback, client critiques, and suggestions, and the most common reasons for this endless cycle is miscommunication, vague feedback, and lack of a system.
So even if you do end up saving some hours during the design process, a broken feedback system would completely ruin those efforts, and can even add more time to your workflow. That’s why companies like Miss Amara uses industry leading feedback management tool—GoVisually to manage their visual content and reduced content turnaround time from weeks to just 3 hours.
Want to see how GoVisually can fit in to your creative workflow for similar results? Book a call with our experts for a free consultation call here.


