Why take up the clicking fuss when you can work like a pro with after-effect shortcuts?
While enhancing the quality of visuals post-production, clicking with a mouse becomes a tedious task that takes up your precious time, which could be used elsewhere.
In that case, After Effect shortcuts, more specifically Adobe After Effects, do wonders for you by saving up your time on post-production hassle efficiently. However, if you are new to these efficient techniques, we’ve got you covered.
We’ve put together 30 After Effect hotkeys for you that you can utilize in your next project.
Cut design & video review time in half
Try GoVisually free today!
Table of Contents
What is Adobe After Effects?
Adobe After Effects is a tool developed by Adobe to compose, animate, rotoscope any visual content. The software is ideally used by production teams and artists for various post-production activities. For example, for designing 3D content, a video producer can use Adobe After Effects for animation and simulation effects, particularly for films, video games, etc.
Additionally, Adobe After Effect holds 2.2% of the market share, with 59% of the customers based in the United States, out of which 6% of customers are in media production, and 7% in marketing and advertising. On top of that, the software has been used by companies such as The American Red Cross, Terr Cycle inc, MSLGROUP, QA Ltd, with several others.
Anyhow, if you are new to these tools, we have put together a list of efficient shortcuts for you that you can eyeball before putting your hands on any of them.
Top 30 After Effects
After-effects shortcuts include some basic and advanced levels, but once you get the hang of it, it can help to boost your workflow. Moreover, these shortcuts differ slightly in Mac and PC. You can use Command and Option instead of Alt and Ctrl alternatively if you are a Mac user.
1. Ctrl + Double Click (Anchor Point)
When you create content in text or a shape, you may have difficulty when the object is not in the center, making the content look poorly placed and vague.
This could be done by moving the cursor to adjust but without the accuracy of edges. In this regard, using a shortcut key for fixing this After Effect can save your time of manually changing the object to bring on the anchor point. You can use your keyboard keys Ctrl with your mouse by double-clicking it to overpass this hassle.
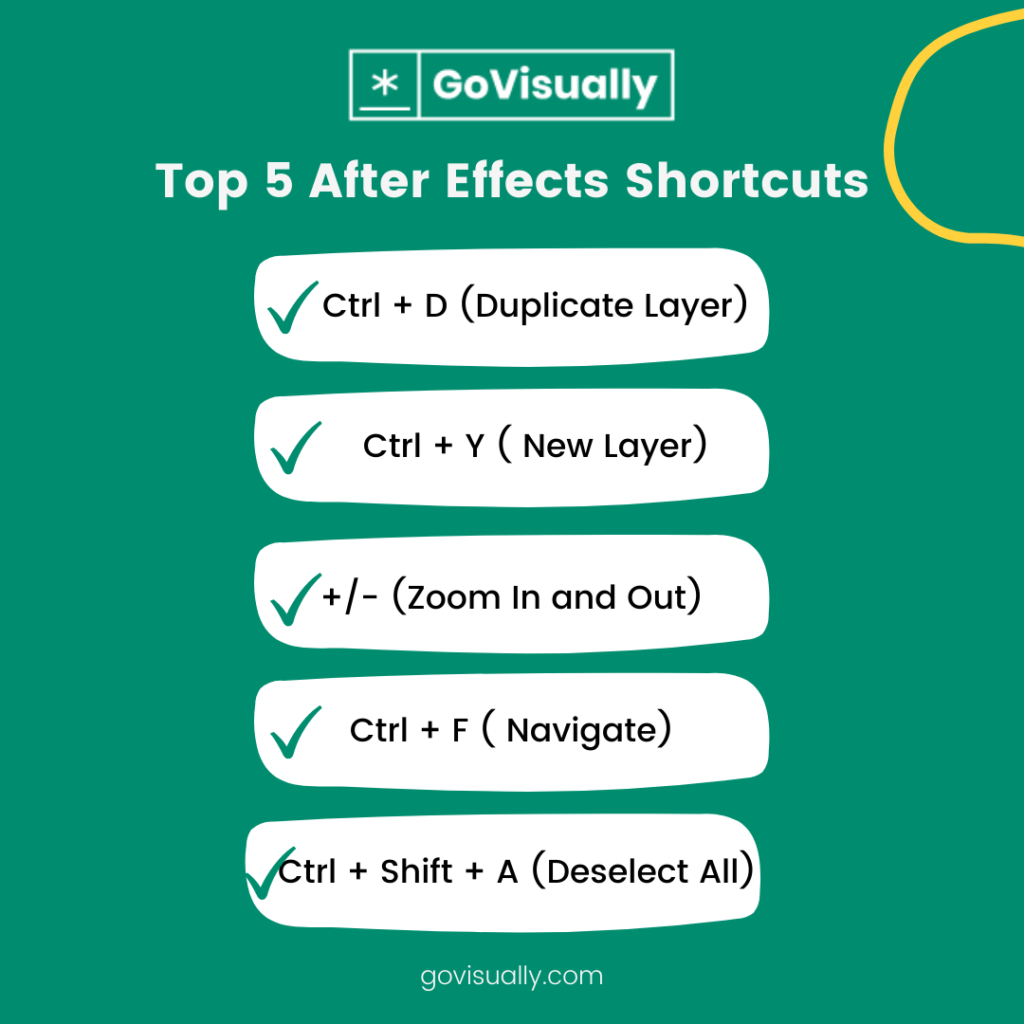
2. Ctrl + D (Duplicate Layer)
While working on a single layer by catering to all the special after-effects according to your project’s demands, if you want to add the effects to several other layers without putting in all the efforts manually, leverage your keyboard by entering Ctrl + D keys.
This technique will help you have the same layer with similar effects as the previous one. You can choose to duplicate one or more layers with this shortcut key without altering the effects.
3. P, S, R, T (Layer Options)
Once you have made some compositions, you may bring in a few changes to your layers. That can include adjustments to shapes, animations, text alterations, size, scale, rotation, etc. However, you don’t need to hit the taskbar and click on each option to alter changes to your layers.
You can use your keyboard keys as a shortcut. For example, you can press P for positioning your objects, S to scale or resize your objects and shapes, R to rotate the object upside down or the other way around, and T for opacity to bring up the required parameters.
Moreover, you can make multiple changes to a single layer or complete layers simultaneously by highlighting them.
4. Alt + Shift + P, S, R, or T (Keyframe)
If you want to create keyframes for the selected layers, you can use your keyboard keys such as Alt + Shift + P, S, R, or T as shortcuts. These key shortcuts are personalized for making a keyframe for each layer by bringing up changes such as position, scale, rotation, opacity separately.
5. Ctrl + Y ( New Layer)
Suppose you are looking to add up a new solid layer into your layers, in this regard, instead of going to the menu option and clicking for adding new layers. You can press the keys on your keyboard to jump off this hassle. The Ctrl + Y key will put a new solid layer instantly.
6. Ctrl + Shift + Y (New Adjustment Layer)
Along with adding a new layer, you can also make adjustments to it with your keyboard shortcuts. With Ctrl + Shift + Y shortcut key, you can create seemingly minor details, but it adds up over time if you use this consistently.
7. Ctrl + Arrow (Move Single Frame)
Additionally, if you seek to add one frame at a time to move your layer head forward, you can hit Ctrl + Arrow (Enter) simultaneously. This is also a viable option for you if you don’t have a full-sized keyboard. Otherwise, you can choose to page up and down.
8. Ctrl + Shift+ Arrow (Move 10 Frames)
Moving frames in your playhead can be tricky with your mouse since it can lag sometimes and take up your time. However, you can move your edges with keyboard shortcuts not to one but ten frames at a time by simply pressing Ctrl + Shift + Arrow.
9. Alt + Arrow ( Move Keyframe 1)
Similarly, if you don’t want the idea of moving your playhead but keyframes, you don’t have to click for that either. You can use your keyboard as a shortcut option with Adobe after-effect shortcut keys Alt + Arrow (enter). This is also when you don’t have a full-size keyboard. Moreover, you can also move your keyframes ten frames at a time.
10. Alt + [ (Trim)
If you want to trim the layers in your playhead, the adobe after-effect shortcuts can do that for you at this instant. The shortcut can be used by selecting the layers on the current timeline and pressing Alt +. This shortcut is convenient; however, it could skip the current timeline if it is not highlighted before pressing the keys. Apart from that, this adobe after-effect shortcut key will work efficiently for you if you need to cut down the size and shapes of your layers.
11. U ( Show Keyframes )
Getting to specific keyframes sometimes becomes a tedious task through all of your layers. In this regard, you can use your keyboard Alphabet “U” key by pressing it to show all your keyframes in the layers at once.
Moreover, you can hit it again to go back to your current layer. By doing this, you will have an option of overviewing your previous progress and can match it to follow the sequence in new layers.
12. U + U (Expand Everything)
If you want to look at every detail of your keyframes and layers, you don’t have to click on everyone. This after-effect shortcut literally will show you all of the properties and features used in all of your layers.
The properties and details of each layer will expand on your screen by just pressing the u+u key simultaneously.
13. Alt + Drag (Stretch Keyframes)
It can become time-consuming if you choose to work with keyframes for a long time by creating various animations, visuals, and graphics.
However, you can boost up this technique with your after-effect keyboard option. Having said that, you may have come across the untidy process which gets too fast or too slow for you by moving each keyframe to adjust.
You can mitigate this hassle and select and highlight all the keyframes you need adjustments for by pressing Shift and arrows to select the area to highlight. After doing this, press and hold Alt and then click and drag the entire set of keyframes with your mouse to stretch it propositional.
14. Ctrl + Alt + T (Time Remap)
Setting the duration of your videos can be a stressful feat for you. That’s because you need to select the part carefully not to alter the one you want to keep. That’s why clicking on the timeline of your films or videos and dragging back and forth to adjust the screen time of your video content is a tall order.
In this regard, using your keyboard to cut down your screen time duration will save you a considerate amount of time.
You can use Ctrl + Alt + T to select and highlight the part you want to alter and then crop it according to your preferences. However, don’t forget to put this shortcut key on the produced ones since it can also change them.
15. Alt + R (Reverse Keyframe Order)
If you wish to reverse the order of your keyframes in the timeline, it can be done instantly.
However, instead of using your cursor to move the keyframes back and forth, you can use your keyboard keys as an after-effect short for bringing up this change.
You can select and highlight the keyframe of which positions you want to change and press Alt + R at once to reverse your current keyframe.
16. F9 (Easy Ease)
It lets you automatically adjust the speed of your keyframe and bring up animations. However, you don’t need to call upon the graphic editor for this one since your keyboard shortcuts are at your disposal to help you create smooth animations.
Having said that, the F9 key on your keyboard can help you to effortless ease your keyframe. You can select a single keyframe or multiple keyframes and then press F9. This effect shortcut can be used by pressing function 9 for Mac users.
17. Ctrl+ Alt + G (Interpret Footage)
If you are looking for a clip of your film /video on your keyframe not to duplicate it repeatedly, then this after-effect shortcut is for you. This short opens up an interpreter footage toolbar for your current file, and you can have various footage interpretation options in it. For example, managing hues, time duration, PAR, frame rate with only one press!
18. K (Next Keyframe) / 3 or J (Previous Keyframe)
If you are working on various keyframes at once, you will need to bring up changes and add to multiple keyframes simultaneously. In this regard, you may end up hoping to keyframes more than usual.
However, you can mitigate this time-consuming process by merely pressing K for jumping on to the next Keyframe to work on instead of clicking separately on each keyframe. Similarly, if you wish to go back to the previous keyframe for making some changes, you can press the 3 or J key to go back and carry it out.
19. Ctrl + Shift + D (Split Current Time Indicator)
When you have a convenient option to work on splitting the layers at CTI with your keyboard, why would you take up the long haul of going to the menu and clicking on the options manually?
The layers on your timeline can be split by pressing one of the convenient effect shortcuts, Ctrl + Shift + D. This Adobe after-effect shortcut allows you to break the layers to your selected layer, which doesn’t reflect on the still content, unlike the trim shortcut. Additionally, you can utilize it to delete extra unwanted layers.
20. Ctrl + Alt + B ( To Overview an Area)
Once you are done with your animation project, you would need to look back at what you have created so far to be in the sequence. This would take a lot of time to review the layers by selecting each layer.
However, this task can be altered if you take up the shortcut by highlighting the layer you want to check and pressing Ctrl + Alt + B can swiftly you directly to overview the area of the selected layer and exclude other layers to save your time.
21. Shift + 0 ( Render Frames)
Moreover, if you want to preview the compositions to know what your content looks like, you can press Shift + 0 to cut out the average rendering that your computer does. However, while working on a PC, this 0 has to be on the number section of your keyboard.
22. +/- (Zoom In and Out)
The zooming in and out shortcut can be used like on every other platform by pressing + and – with the Shift key on your keyboard. Moreover, you can also focus and zoom on the selected area with the scroll wheel on your mouse or using two fingers on the trackpad.
23. Ctrl + Alt + / ( Element Replacement with Properties)
You might have created content, but how will you manage to change if some elements need replacements? Indeed, with keyboard After Effect Shortcuts.
For example, you have put together a great animation, but you need to take out something such as a logo or replace the color of a shape, etc., but don’t want the changes reflected on other content.
You can leverage Ctrl + Alt + / Adobe after-effect shortcut to select and replace any object on the animation you have created without having to readjust the entire layer. In addition, you can use the other to choose the content, i.e., a layer that you want to replace by holding Alt and then clicking and dragging the object into the composition timeline.
24. Ctrl + Shift + C (Precompose Layers)
Once you have assembled the replaced animation into the composition window, you may want to precompose the layers to put the prepared content into an extended composition timeline.
However, the process isn’t tedious with the mouse as well. You can right-click on the timeline and select the pre-compose option, but it is up to you to utilize the after-effect shortcut for this one. You can highlight layers you want to be included in your extended composition and then press Ctrl + Shift + C to quickly turn all the content into a single layer.
25. Mouse Over + (~) Tilde (Maximizes Your Panel)
If you have created plenty of layers by now in multiple composition timelines, fitting them into one frame might stiff the animation in the small area. As a result, working on them will become a difficult task.
However, we have a solution for you. You can use your mouse and keyboard combination for this one by hovering your mouse and pressing the tilde (~) key right below the Esc option on your keyboard with Shift.
After doing that, you will have a substantive amount of room for adjusting your keyframes, layers on a big composition window. If you choose to go back to the standard size panel, you can press the tilde key with Shift again.
26. Hand Tool – Hold Space (Move the Image)
If you want a closer look at your animation, you can click on the -/+ option on the screen or scroll the wheel of your mouse. However, if you are looking for a more precise focus on specific areas of an image, you can use a different tool or Adobe after-effect shortcut.
For example, you can press and hold the space bar, click on the image and drag it around on the screen with a hand tool. The use of the keyboard and hand tool for bringing up After Effects on your content is much faster and reliable since as you let go of pressing the spacebar, it can go back to the same position as it was.
Moreover, if you are using a pen tool to create something on the image, this tool won’t interrupt in between.
27. Shift + \ (Fit the Image to Screen)
After making the necessary adjustments by focusing on your animation, if you are a perfectionist, you can choose to go back to normalizing your content as it was before by pressing Shift + \. This way, everything will be fitted back to your composition window.
28. Ctrl + Shift + H (Layer Control Options)
After adjusting your work to fit the frame precisely, you may have noticed that your grayscale or mask outline on your panel has been missed out. Don’t worry about it, and you haven’t lost your previous data. That’s because you might have switched off your layer control area in which you could see and select the layers for alterations.
However, you can bring the outline back by pressing Ctrl + Shift + H. Moreover, it can help you clear out extra tabs that you may have created for various compositions and settle with the final static design.
29. Ctrl + Shift + A (Deselect All)
As pressing Ctrl + A on your keyboard helps select a particular section, the additional combination with Shift can also take you back to deselect it. If you have set a layer or a keyframe to stretch, expand, replace, etc., you go back to deselecting it without having to click your mouse for that by pressing Ctrl + Shift + A.
This way, your screen focus will be where you want it to be. In addition, to make the process quick with one press, you can press F2 or function 2 on your Mac.
30. Ctrl + F ( Navigate)
You might be aware of this shortcut in general for navigating and searching the terms and sections. There’s no exception with the Adobe after affect software. You can use these shortcut keys on your keyboard by pressing Ctrl and F at once.
In addition, the after-effect shortcut is more potent in this tool since it not only help you to find the layers and keyframes but by using keywords, you can view the properties of all layers.
Want to send big files?
Need a quick way to share large files and creative assets?
With GoVisually Share, it’s absolutely free! Try today.
