Creativity is the company’s most prized asset.
We’ve all heard this phrase before, but we never take it seriously, and that’s a problem. As a creative agency, what sets you apart from your competitors and adds value to your brand is your creative process.
However, in today’s marketplace, the necessity to get instant approvals on projects can bar your creative flow. Each day, we witness several unique new ideas turn into products that are then launched in the marketplace. And to compete in such a challenging environment, you need to be innovating constantly and effectively.
But what if we tell you that there is a way to overcome that?
The answer is building a creative approval workflow that’ll get your creative process flowing.
But how exactly do you do that? And what are the tools you can use to help you in your creative approval workflow?
Let’s find out.
Table of Contents
What is a creative approval workflow?
Before we start on the steps to build a creative approval workflow, let’s clarify what it is. An approval workflow is a pre-established plan-of-action a firm adheres to whenever something needs to be approved, such as a budget change, an affiliation request, a salary raise, etc.
Similarly, a creative approval process is the list of actions that are taken for approving an idea about a new product and service.
You might be thinking, why is a creative approval process so important? Well, we’ve discussed that next.
Why is creative approval workflow essential?
As an organization devoted to creativity, you’ll be dealing with a bunch of new ideas and client requests every day. Not having a formal structure for dealing with these problems can be quite a hassle, and it can cost you a lot more resources. This is why a creative approval workflow is so crucial.
Having an already existing method to follow will make your creative processes function more smoothly. Consequently, you’ll be able to analyze ideas, filter the right ones, begin innovative design, and incorporate feedback a lot more quickly.
As a result, your company’s efficiency will increase, and you’ll save yourself valuable time and money. More importantly, you’ll become more focused on improving your brand’s creative value and enhancing it.
Are you excited about starting your creative approval process? Good!
The step-by-step guide below illustrates exactly how you can do that.
Step 1: Define the idea
In the first step, you’re going to start by defining which need it is that your product will be fulfilling.
Once you’ve done that, then it’s time to create a generalized structure of what the product is going to be like, and finally, write down a plan that details how this will be done.
If all of this sounds vague and incomprehensible to you, then don’t stress out. We’ve listed down some of the steps which are usually included in this phase.
- Design your creative brief, which should incorporate the following information:
- Your product’s intended purpose
- The targeted customer base
- Your total budget
- The period within which the product objectives should be accomplished
- Starting establishing contact with all the workers who are involved in this product
- Write down goals for the project, which are specific, measurable, achievable, relevant, and time-bound.
- Create standards through which you can monitor the product’s success
- Create teams and assign every member their duty
- Determine the most significant obstacles you will encounter
- Analyze your competitors and try to think of ways through which you’ll establish your product as unique.
- Start utilizing creative tools which will speed up your work.
- Devise a plan for managing and adjusting your team’s workload.
- Keep your client’s expectations in mind while doing all this.
Step 2: Brainstorm and engage the team in discussions
Since you’re creating a product, you want team creativity to be at its maximum, and nothing does that better than brainstorming. Remember, the first rule of brainstorming is that no proposition is a bad one.
Therefore, no matter how crazy or the out-of-this-world your idea sounds, you still get to share it. Pretty cool!
After you’ve brainstormed and collected all possible ideas, it’s time to sit down and start analyzing them by considering both their pros and cons. This way, you’ll effectively be able to narrow down your pool of ideas to those who have the most excellent chance of being implemented.
Lastly, it would help if you started looking at your ideas in comparison with the existing competitor products in the marketplace.
By doing so, you’ll be able to see how well your product can potentially do when it’s going to be launched in the market. Furthermore, you’ll be able to know if any changes need to be made, which will make it more competitive.
Before moving on to the next step, however, we’d like to emphasize the importance of one particular factor, which will have a significant impact on how well your creation process goes. That process is a team environment.
Since the entire step 2 of this process will be conducted in teams, you must establish a productive team environment that fosters creativity and critical thinking. You can do this in several ways:
- Hold meetings at regular intervals to discuss the group project and solve any grievances.
- Encourage all members of the group to speak up.
- Reward creative ideas
- Use collaboration software to enhance your team’s synergy.
Step 3: Review and approve
So you’ve finally decided on an innovative and exciting idea for the client’s product or project. Congratulations!
In this part, you’ll begin designing your product while continuously reviewing it and giving feedback. Let’s discuss in further detail some of the steps you need to take in this phase.
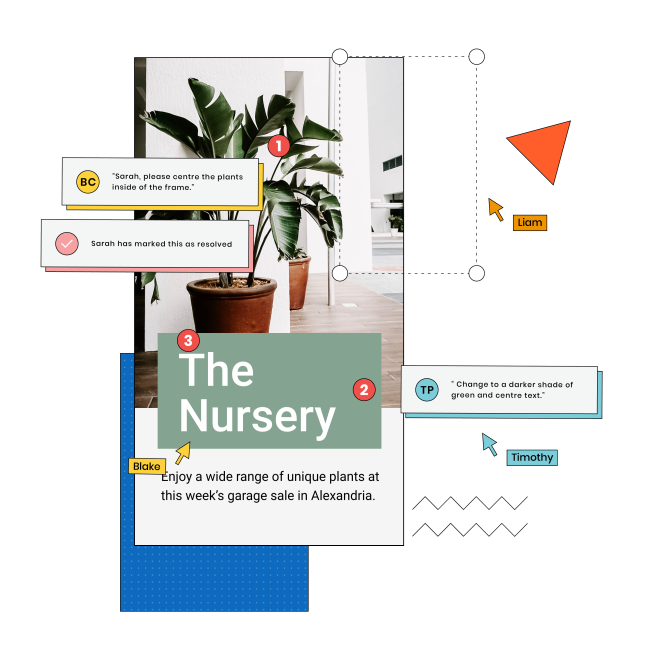
You need to show your product to your client to ensure that they are satisfied with it. Explain to them how you’re going to be designing it, and make any changes if they ask you to. After you’ve done that, you should then direct your focus towards creating a cohesive review system that gathers feedback from all the workers and displays it in a centralized format.
To make this step more comfortable for you, try GoVisually, where you can make the feedback highly efficient and interactive.
Step 4: Handover the project to your clients and add it to your portfolio
You’re almost done! The final step is to successfully handover the completed project to your client.
But before you do so, it’s beneficial to maintain contact with your client and answer any queries they might have. Dispelling their concerns or confusions before handover would prove to be right for you as it allows you to move to the next project with a free mind.
You can also use software to ease the handing over process to you. As it happens, GoVisually lets your client download all the project files and designs quickly. The best part is that they don’t need an account on GoVisually, only you do.
Moreover, we’d advise you to keep an archive of your assets, reviews, and feedback on your GoVisually account. This way, you can also use them as future reference if need be. For instance, if a disparity occurs after the project completion, you can always refer to the archive assets and solve them.
Lastly, while looking out for your client’s best interest, keep your best interest in mind too. Ask permission from your client to add the project to your creative agency’s portfolio. Doing so will help you keep your portfolio updated and attract more clients for the future.
Time to start being creative with your creative workflow approval plan!
If you have a great creative idea for a product and the resources to implement it, then what are you waiting for? Go ahead and start working!
At the same time, don’t forget to include this creative workflow in your creation process. It will guarantee that you make your new product much sooner with fewer costs.
