Blazing Fast Post Production Workflow: 10 Tips For Editors

Faster video production is the mantra of all video productions nowadays. And there's a reason behind that - video alone can drive a 157% increase in organic traffic and reach. And it doesn't end here. A world full of raging millennials and Gen-Z are all about video content. That indicates that if your post production workflow isn't streamlined, you'll probably be stuck running around for a faster video editing workflow.
While every editor has their workflow, there are specific tips and software that you can use to notch it up a bit. Think of them as your cheat sheets for faster success for a speedier video production percentage.
What is a Post Production Workflow?
But before we get to the tips, let's do a quick rewind of what a post production workflow is exactly. Simply put, it's the production stage that happens after shooting is complete. Everything is a part of post-production, from editing the clips to working on sound, adding effects, and creating the perfect look.
So here's a quick overview of how a post production workflow looks like. This would give you an idea of what you're supposed to do generally.
- Start by importing or transferring the medial files from the camera to a storage device.
- Once that is done, name the file. We'd suggest creating separate folders for separate clips.
- Also, name the files so you can recognize them easily. We know the urge to name a file final, final edit but try resisting that. Name the file with a more straightforward and useable name.
- Start by editing the raw footage and take out a rough cut. This would help you organize your timeline better and give you an idea of what clips to include.
- Add sound and music to the video.
- Add animations, effects, transitions, and color correction.
- Once this rough cut is ready, export it and save it on your device.
- Review it with your team or client and make edits.
- Ensure that the sound is clear, audible, and, put, the best part of the video. Trust me, a bad sound can put off the viewer.
- Take out the fine cut by making final changes.
Sound easy, right?
It's not, actually. Several things can go wrong while shooting. The sound recorded could be bad. There can be a lot of background noise with little to no noise reduction possibility, the footage could be missing, a frame setting could be wrong, or perhaps you don't feel the vibe you were hoping to achieve.
In any case, all of these glitches are fixed in post-production. This means that you will likely regret taking the project if you don't plan to get you through. And we don't want that, right?
So coming up next are the 10 most effective tips for a faster post production workflow. Let's look at these.
Tip #1: Start by organizing your assets
Before you even think of editing, organize your footage. We can't emphasize this enough. It's because if you don't have an organized set, you'll end up in a chaotic mess of files.
Now, admittedly, this will test your patience, especially for a big project. You will have a lot of media files, and categorizing them wouldn't be easy. However, if you start doing it for every project, not only you'll get the hang of it, but more importantly, it will make your editing journey much easier.
Here's how you can organize your assets in a better way:
- Create a separate folder for each scene's footage and audio
- If you want, you can even have subcategories for footage, audio, and images.
- Make sure that the clips are properly named. It would help if you ideally named them with the scene number or the shot number.
Apart from that, organizing your assets in different categories can help too. For your ease, go by the 4 categories rule.
- Video files: Include all the clips and video assets here.
- Visual effects: You can keep all the transitions or the effects you want to use here.
- Audio files: This includes background music, soundtrack, voiceover, narration, and sound effects.
- Images: Keep all the images and scene snaps here.
Tip #2: Follow a vision throughout
Nothing kills creativity like a bad plan, and we know that. However, we also want you to know and implement that while editing.
If you let yourself loose in the flow and go with your vibe, you can often end up in more trouble. So it's always good to have a vision for the entire footage and stick to that. Of course, you can add your creative punch here and there, but a creative vision will save your project.
Here are four simple ways to do that:
- Chalk out the objective of the video. If you're clear on the goal, it will be easier to decide the direction.
- Watch an initial run-through of the footage and jot down a basic outline. This will help you keep track.
- Consult with your clients or creative director before you start editing. This will save you a lot of trouble! You don't want to edit a beautiful rendition only to hear, yeah, but we're going for something different. So ensure that they are a part of creating the vision.
- And finally, set deadlines for each editing milestone. This will keep you in check and on schedule.
Tip #3: Use a pancake timeline for better results
Pancake timeline is a video editing technique that refers to working on two timelines simultaneously. The idea behind that is to create two timelines where one can experiment with the clips, and the other is used for master edit.
Many editors find this useful as it allows them to quickly review the clips and make quick decisions about which would go best with the next. More importantly, it saves you the time for creating a separate master edit. Moreover, you remain consistent in your pace, and your edited snippets can be reviewed at any time.
Tip #4: Use the right gear or invest in it
I can not emphasize the importance of using the right gear. Yes, some people will tell you not to compromise on an opportunity because you don't have gear, but that can often be misleading and far from the truth.
In reality, the right gear guarantees great footage and easier post-production. Now notice how I've used the term right gear. That essentially means that you don't necessarily have to buy ane expensive gear to work. You need to use gear that best matches your needs and requirements.
For instance, you can edit beginner level footage on an entry-level computer. However, if you have a large processing file with many effects to be added, you will need a powerful and upgraded system or software like Final Cut Pro X.
Similarly, the wrong choice of camera for shooting can also slow you down. Firstly, if your camera only records SD cards, it could be a real painful task to transfer data as there would be many files. This could also take up a lot of time, depending upon your system and other variables. Secondly, the wrong camera choice would mean footage that is compromised. Not only it can have an adverse effect while adding animations or effects, but it can also make your footage pixelated.
So to ensure that this doesn't happen, you can choose Gnarbox 2.0. It is a battery-powered SSD drive with an SD card slot. So what does that mean for you?
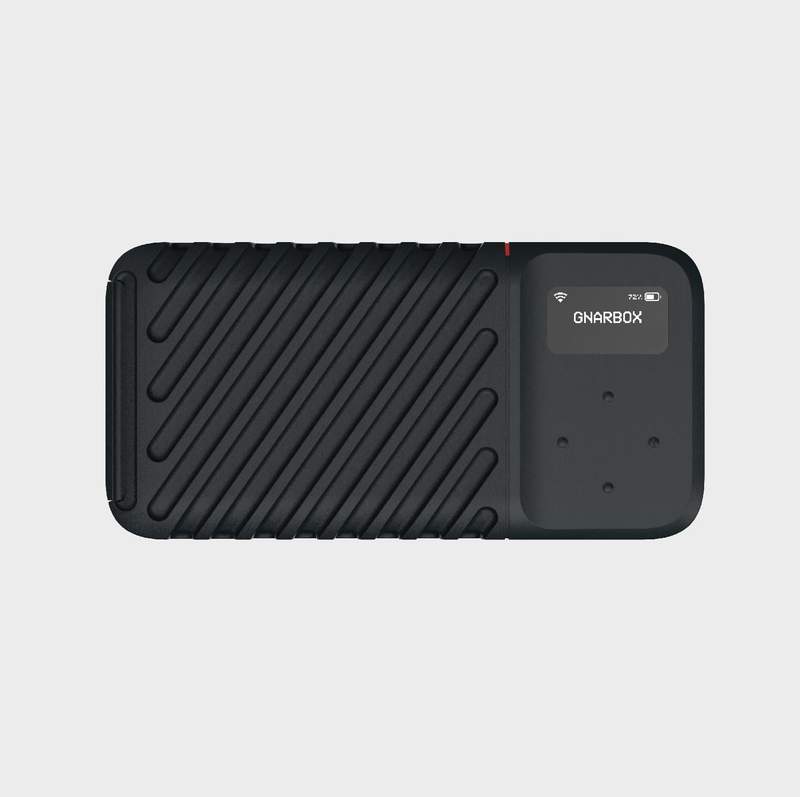
It means that you can consolidate multiple cards faster before you even start editing. Plus, it is waterproof. How cool!
Tip #5: Create project templates
The most important thing you can do to ease your workflow is to create project templates for each project type. If you find yourself creating a new project template every time and starting from scratch, you'll end up exhausting your creative abilities. Moreover, it would end up taking a lot of time and resources.
If you create project templates, it will help you with several other aspects as well, such as:
- You'd recognize your organizational methods.
- You'd know how to split your media.
- The location, as well as media type, will be easily sorted.
- You wouldn't have to start from scratch every time. You can replicate the template for a similar project type.
- It allows you to be more creative. For instance, if you want to create a marketing video and already have a structure in place, it would leave room for you to explore creativity instead of spending time setting up a framework.
Tip #6: Learn some quick shortcuts
Our next tip involves something obvious, yet most people miss out on it while planning their workflow. Wondering what that might be? Shortcuts!
It's 2021, and things are moving pretty fast. So if you want a blazing fast workflow, apply shortcuts instead of moving around your mouse. Instead of moving your mouse to click on the Blade tool and moving it around the timeline, create a shortcut for it. Hit Ctrl/Cmd+K (Premiere), Cmd+B (FCPX), or Ctrl/Cmd+\ (Resolve) and you're done.
You can list down the steps that take the most time while editing and then learn quick shortcuts for them.
Tip #7: Use GoVisually for blazing-fast video editing!
This one's pretty obvious, too - isn't it? But it's also the most important one. And that's because a significant part of editing involves making the right edits and to ensure that, you need client review and coordination among your team.
Now you can choose to do it the old fashioned way - using chaotic email threads that have a decent chance of driving you crazy. Or, you can choose to modernize your approach and get instant feedback on videos through GoVisually.
[video width="1616" height="1080" mp4="https://govisually.com/blog/content/media/2025/12/4.mp4" loop="true"][/video]
So don't think up, start your free trial today to see how editing and reviewing become easier and better!
Tip #8: Try remote collaboration with Adobe Team Projects
Our next tip involves another project management software - Adobe Team Projects. Whether you choose to sit side by side while editing or at a distance of 5,000 miles, Adobe Team Projects is yet another powerful tool to make simultaneous edits easier.
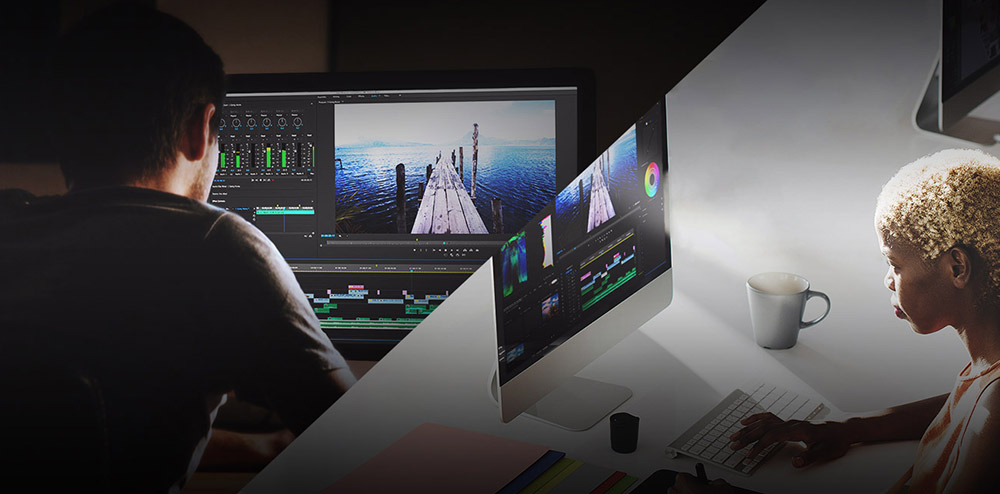
As soon as you make an edit, a notification pops up on your second editor's screen, notifying them of the change so they can refresh and get the same sequence. Does it get any better?
Actually, it does - you can even choose auto-saving to sync in the changes as you go along. You can also invite other users to the file so they can review it as well.
It's a simple solution for everyone using Adobe for editing. However, there's just one drawback that you'll have to keep in mind. You'll need to ensure that you're a part of the Enterprise or Teams account on Creative Cloud, as this isn't available for individual subscribers.
So ideally, we'd suggest it for big media houses using Adobe for video editing.
Tip #9: Optimize your media files before using them
This means taking in your original media files and creating a new transcode for them during NLE (non-linear editing). These are also generally referred to as mezzanine or intermediate codes. Here are the 3 most common types:
- ProRes
- DNxHR
- Cineform
The advantage you'll get from this is that these files are easier to process and handle than the original files. However, this can also depend on the editing program that you're using. So do a little research, and then Every program handles this process a bit differently so that you might have to do a bit of searching, but the settings are usually found somewhere in the import window for your respective program.
Tip #10: Create proxies if needed
This is the step where you take your original files, create low-resolution proxies for them, and use them instead for editing.
But why should I use low-resolution media files?
A reasonable question, so here's why: high-res files are great to show you the footage's full quality. However, they can slow your system down and hence slow the editing process. What we're suggesting instead is to create the rough-cut using proxy files and finalize that. That would take you much less time, and once you have the rough cut, you can switch back to the original high-res files for color correction, after effects, and other changes.
This way, you save time, don't risk slowing or damaging your system, and streamline the workflow even more.
Final Word
These 10 tips will not only help you create a more streamlined approach for your team but also boost your creativity. So sit down with your team today, note down your pain points, and take help from these tips to make quick and stable fixes.