
Packaging artwork approval process: how to run brand, regulatory, QA and printer sign-off in stages
Who approves what, in which order, with a checklist for each stage and a workflow template, so nothing skips a step.
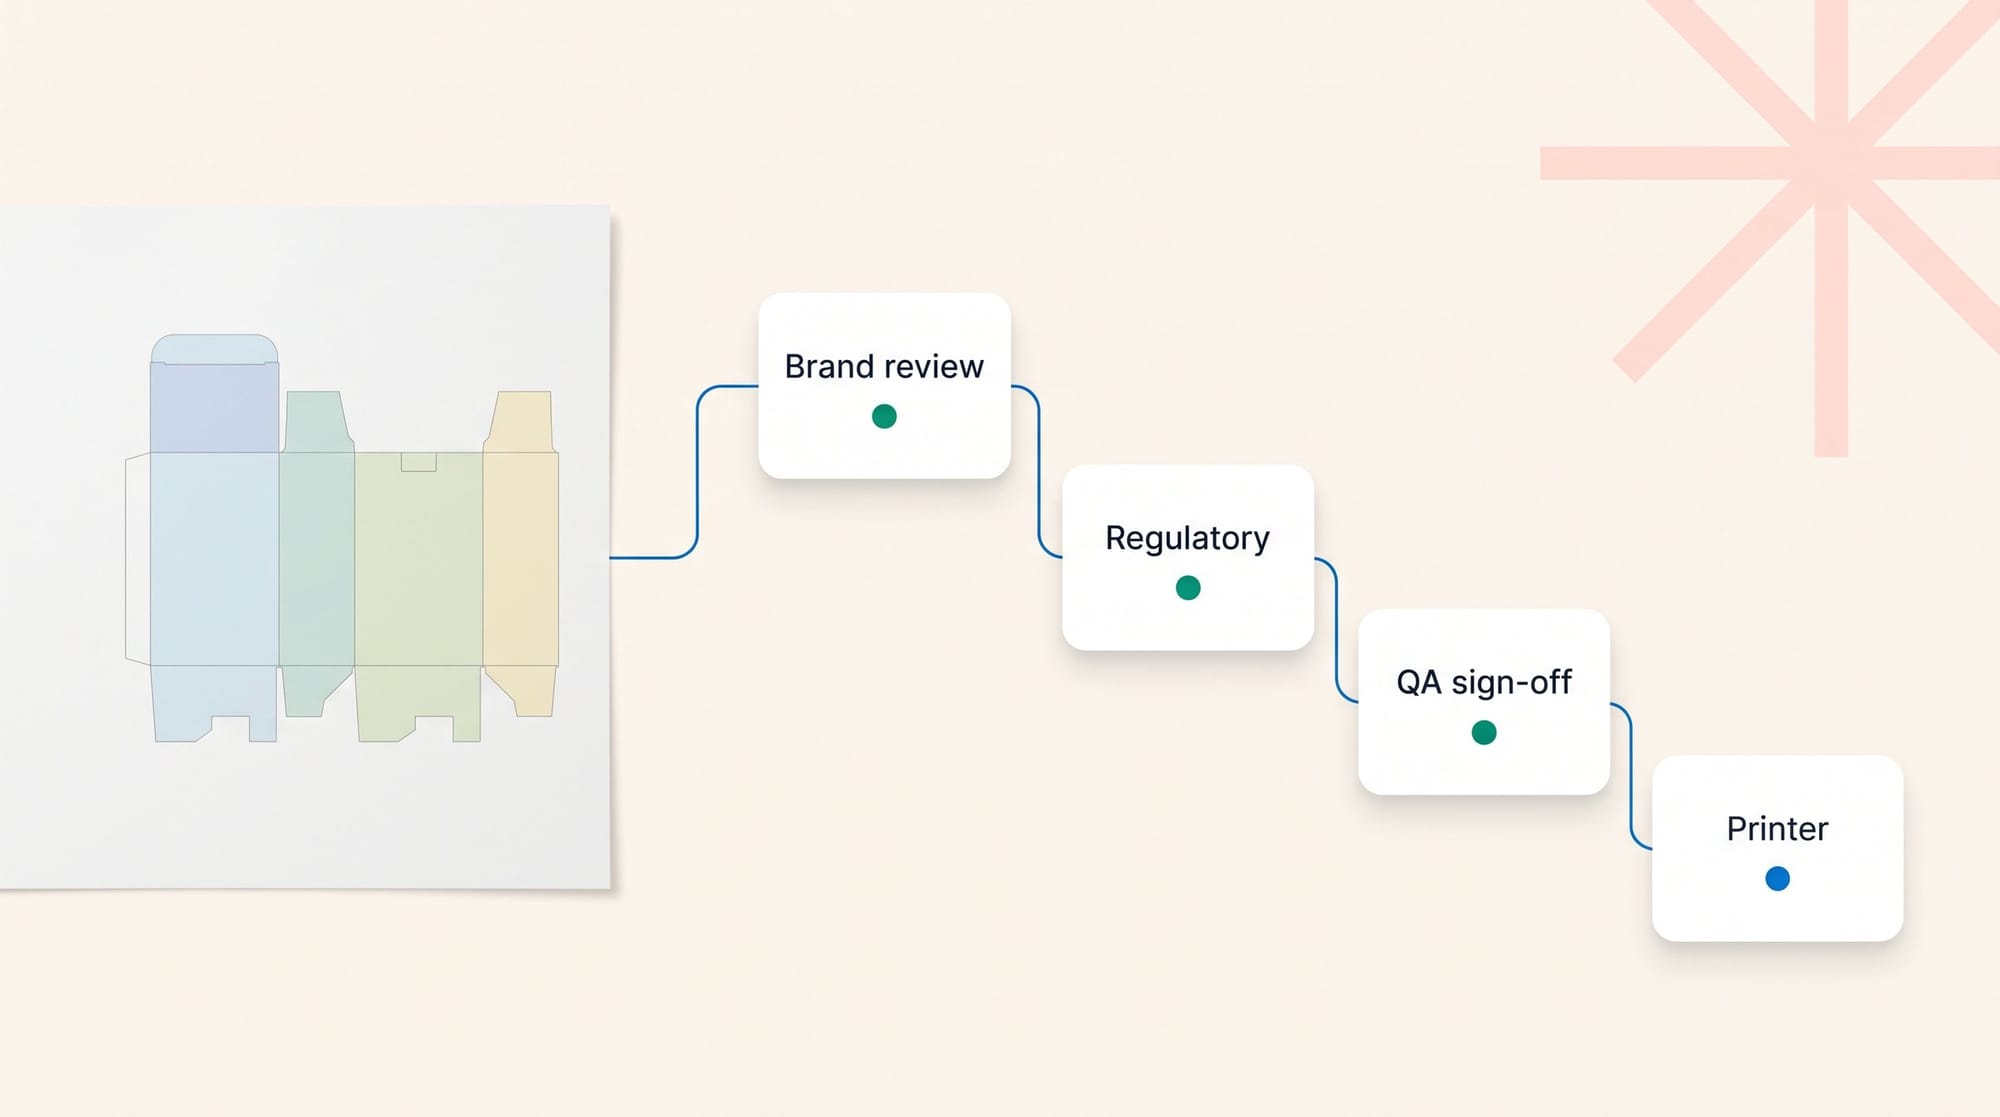
A packaging artwork approval process is the fixed route a label or pack file takes before it's printed. Each stage has named reviewers, one clear job and a deadline. A typical route is brand review, then regulatory, then QA, then printer sign-off. The file only moves on when its current stage approves, and every decision is recorded.
Most teams already have an artwork approval process. It's just not written down. This guide shows how to turn it into staged sign-off: who approves what, a checklist for each stage, a workflow template to copy, and how to set it up so nothing skips a step.
Why the artwork approval process needs stages
A pack is checked by people who look for very different things. Brand looks at the design. Regulatory looks at claims, allergens and the nutrition panel. QA looks at whether the file will print. When all of them get the proof at once, three things go wrong:
- Reviewers comment on things that aren't theirs to decide.
- Regulatory reads a version that brand is about to change.
- Nobody can say for sure who approved which version.
Stages fix the order. Regulatory only sees the proof once brand is happy with it. QA only sees what regulatory has passed. And when someone asks for changes, the route starts again from the top, so every stage approves the same final file.
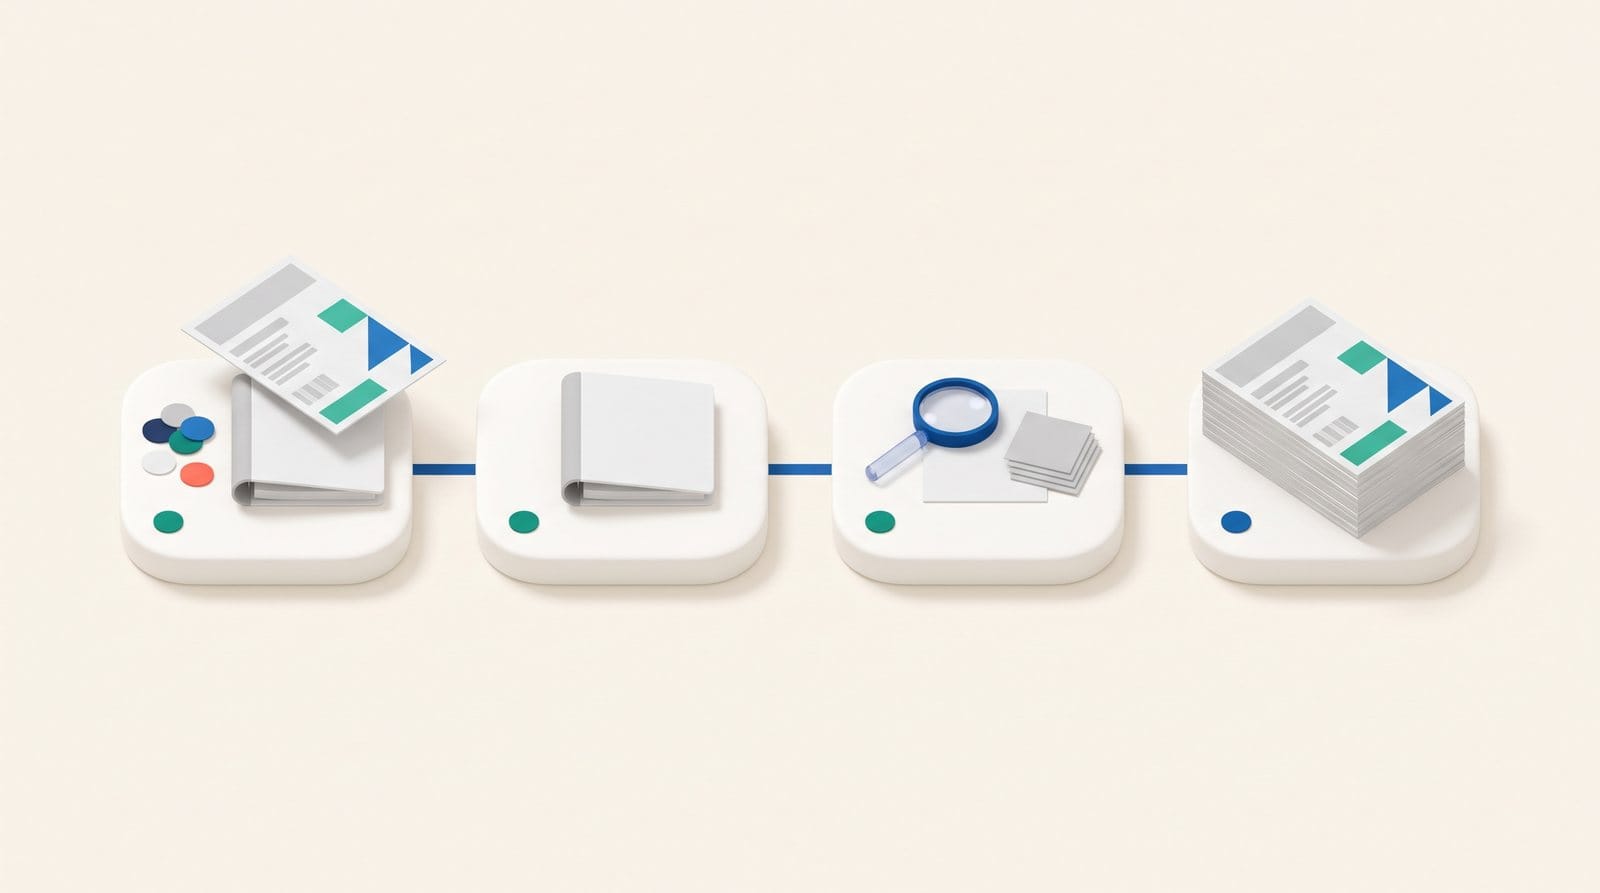
Who approves packaging artwork: a RACI for each stage
RACI stands for Responsible (does the check), Accountable (makes the call), Consulted (gives input) and Informed (gets told the result). Keep one Accountable person per stage. If two people both "own" a stage, nobody does.
| Stage | What gets checked | Responsible | Accountable | Consulted | Informed |
|---|---|---|---|---|---|
| 1. Brand review | Layout, logo, colours, product name, marketing copy, imagery | Brand or marketing manager | Brand lead | Designer or agency | Regulatory, project owner |
| 2. Regulatory review | Claims, ingredients, allergens, nutrition or supplement facts, net quantity, market rules | Regulatory specialist | Head of regulatory | R&D, legal | Brand, QA |
| 3. QA sign-off | Matches the product spec, barcode, batch and date area, colour mode, bleed, dieline fit | QA or prepress lead | QA manager | Packaging technologist | Brand, regulatory |
| 4. Printer sign-off | The exact approved files are received; the printer's proof comes back and matches | Printer or co-packer contact | Project owner | QA | Everyone on the project |
Two rules make this table work:
- Each stage checks only its own column. Brand doesn't argue about allergen wording.
- Write down what each stage checks, as a checklist. There's one below.
Artwork approval checklist
Give each stage its own short list. Reviewers tick only what's theirs.
Brand review
- The product name and flavour are right for this SKU.
- Logo, colours and fonts follow the brand guide.
- Copy and imagery are the approved versions.
Regulatory review
- The ingredients list matches the current formula.
- Allergens are declared the way each market requires.
- Nutrition or Supplement Facts values match the spec.
- Every claim has support, plus any required disclaimer.
- Net quantity, name and address are present and the right size.
QA and prepress sign-off
- The barcode is the right number, size and colour.
- There's space for the batch code and date.
- Colour mode, bleed and image resolution are print-ready.
- The artwork fits the current dieline.
Printer sign-off
- The printer has the exact approved file version.
- The printer's proof comes back and matches the approved file.
For a longer list, see our artwork approval checklist for CPG brands.

Approval workflow template
Copy this as a starting point. It's the Nourish & Co. route for the Peanut Butter Crunch bar wrapper. Change the people and deadlines to fit your team.
| Stage | Stage type | Reviewers | Moves on when | Deadline |
|---|---|---|---|---|
| 1. Brand review | Review & Approval | Two brand managers | Any one approves | 2 days |
| 2. Regulatory | Review & Approval | Regulatory specialist, head of regulatory | Everyone approves | 3 days |
| 3. QA sign-off | Review & Approval | QA lead | Everyone approves | 2 days |
| 4. Printer | Handoff | Printer or co-packer contact | The printer confirms they've received the files | Agree with your printer |
If any stage asks for changes, the new version starts again at Brand review.
How to set up a staged artwork approval process in GoVisually
GoVisually added multi-stage review workflows in October 2026. They're on custom plans. A team admin builds the route once, and every new project can reuse it. Here's the setup, using the Nourish & Co. Peanut Butter Crunch bar as the example.
- Open Workflows. As a team admin, click Workflows in the sidebar, then Create workflow.
- Name it. Call it something your team will recognise, like "Pack sign-off".
- Add your stages in order. Click Add stage and pick Review & Approval. Add Brand review, then Regulatory, then QA sign-off. Drag to reorder if you need to.
- Pick the reviewers for each stage. Use the RACI table and template above. Put only the people who make that stage's call in the stage.
- Choose how each stage advances. "Everyone approves" means every reviewer in the stage must approve. "Any one approves" means the first approval moves it on. Use Everyone for regulatory. Any one can suit brand if you have two interchangeable brand managers.
- Set a deadline. Pick a due time in days after the stage starts. Reviewers get a reminder before it's due, and the project owner hears when a stage runs late. Deadlines are reminders only; they never move the proof on by themselves. Deadlines under one day are on Enterprise plans.
- Attach checklists. Give each stage its part of the checklist above, so reviewers know exactly what to look at.
- Seal a stage if it should stay private. A sealed stage keeps its review to the people in that stage. Useful when an outside partner shouldn't see internal debate.
- Add the printer as a Handoff stage. Click Add stage and pick Handoff. It sends an exact set of approved files to an external production partner. They confirm they've received it, and you can ask them to send a file back, such as their own proof.
- Save, then use it. When you create a new project, choose your workflow under Review workflow. Projects without a workflow work as they always have.
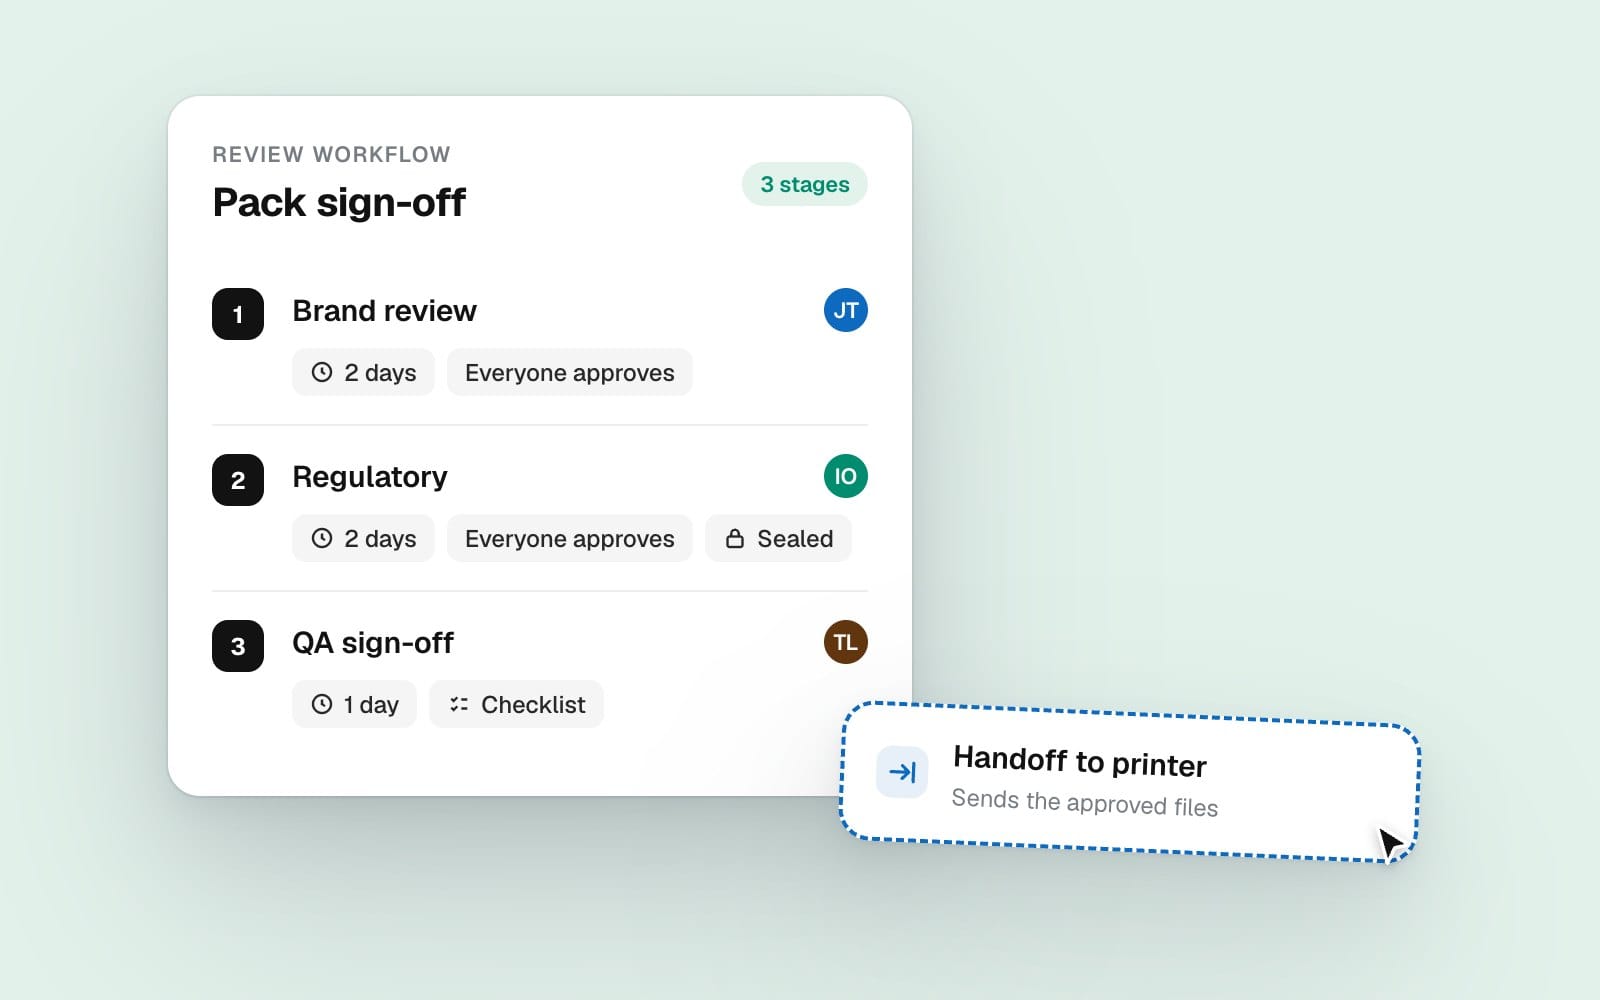
Each project keeps its own copy of the workflow. So if you change the template later, only new projects pick up the change. Live projects aren't disrupted halfway through a review.
What happens once the proof is in the workflow
Upload the artwork and it goes to stage one. The Review pipeline board shows every proof as a card in the column for its current stage.
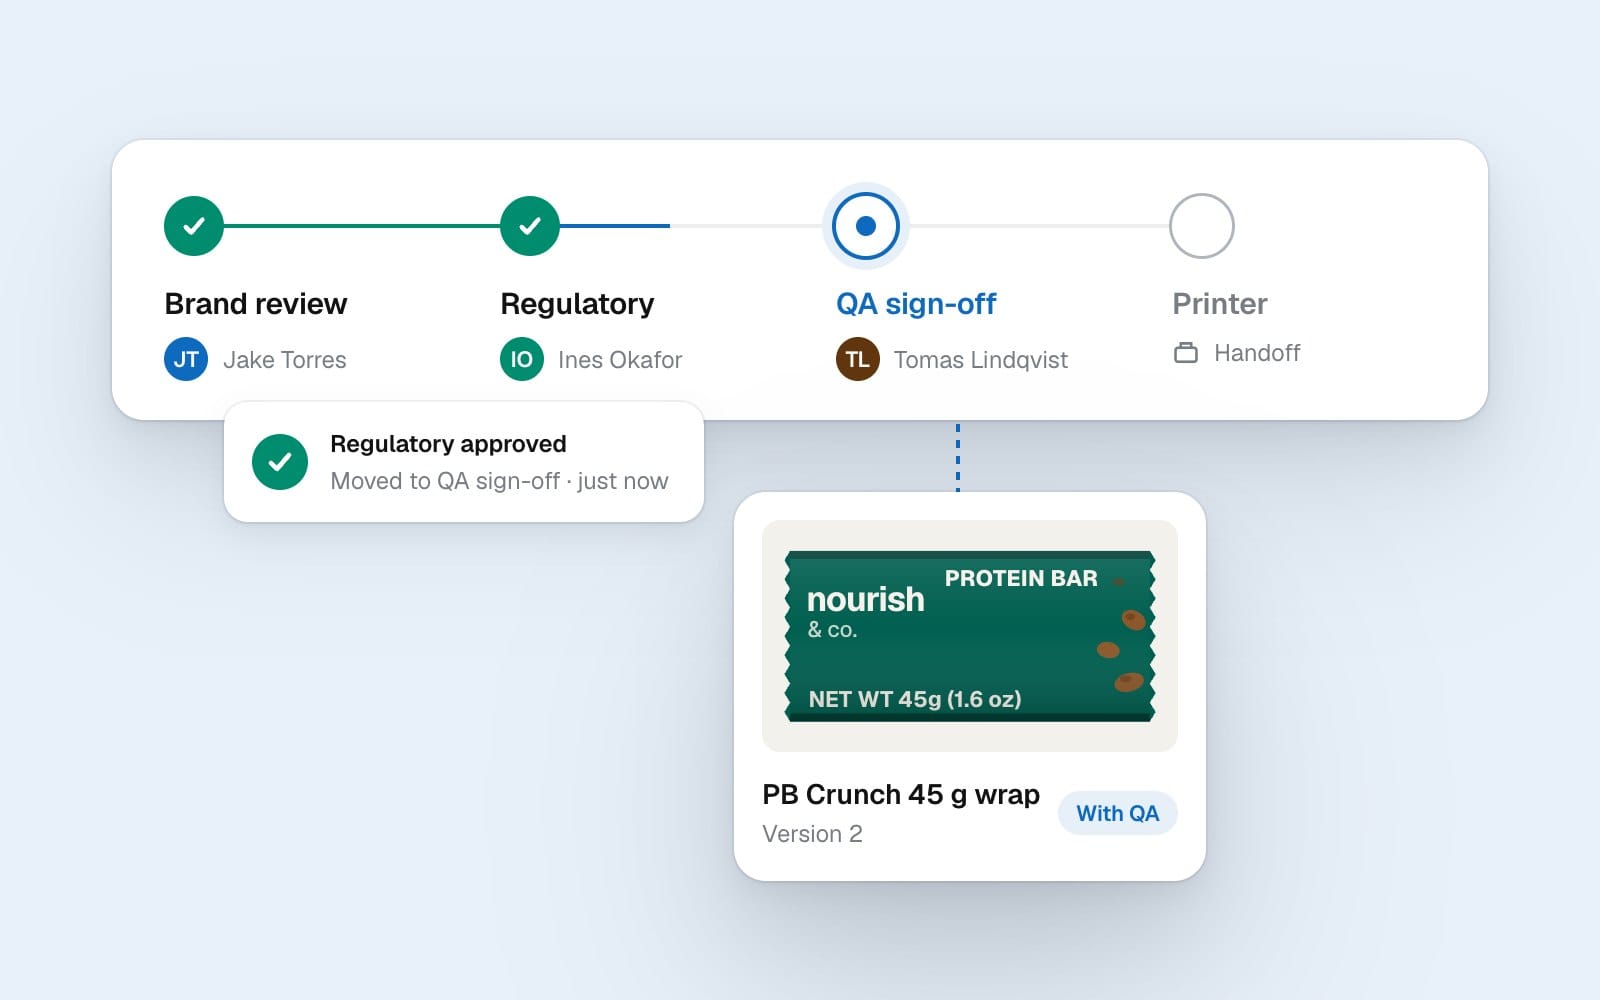
- Only the current stage can decide. Reviewers in that stage see Approve and Needs changes. Everyone else sees whose turn it is.
- Approval moves it on. When the stage's rule is met, the proof moves to the next stage and those reviewers are notified.
- Changes restart the route. If a reviewer asks for changes, the workflow pauses. Upload a new version, submit it for review, and it starts again at stage one.
- Owners can skip a stage when they must. A project owner can drag a card forward. Every move is logged.
Each approval is a verified sign-off. It records the reviewer's name, email, time and a receipt ID in the proof's decision log.
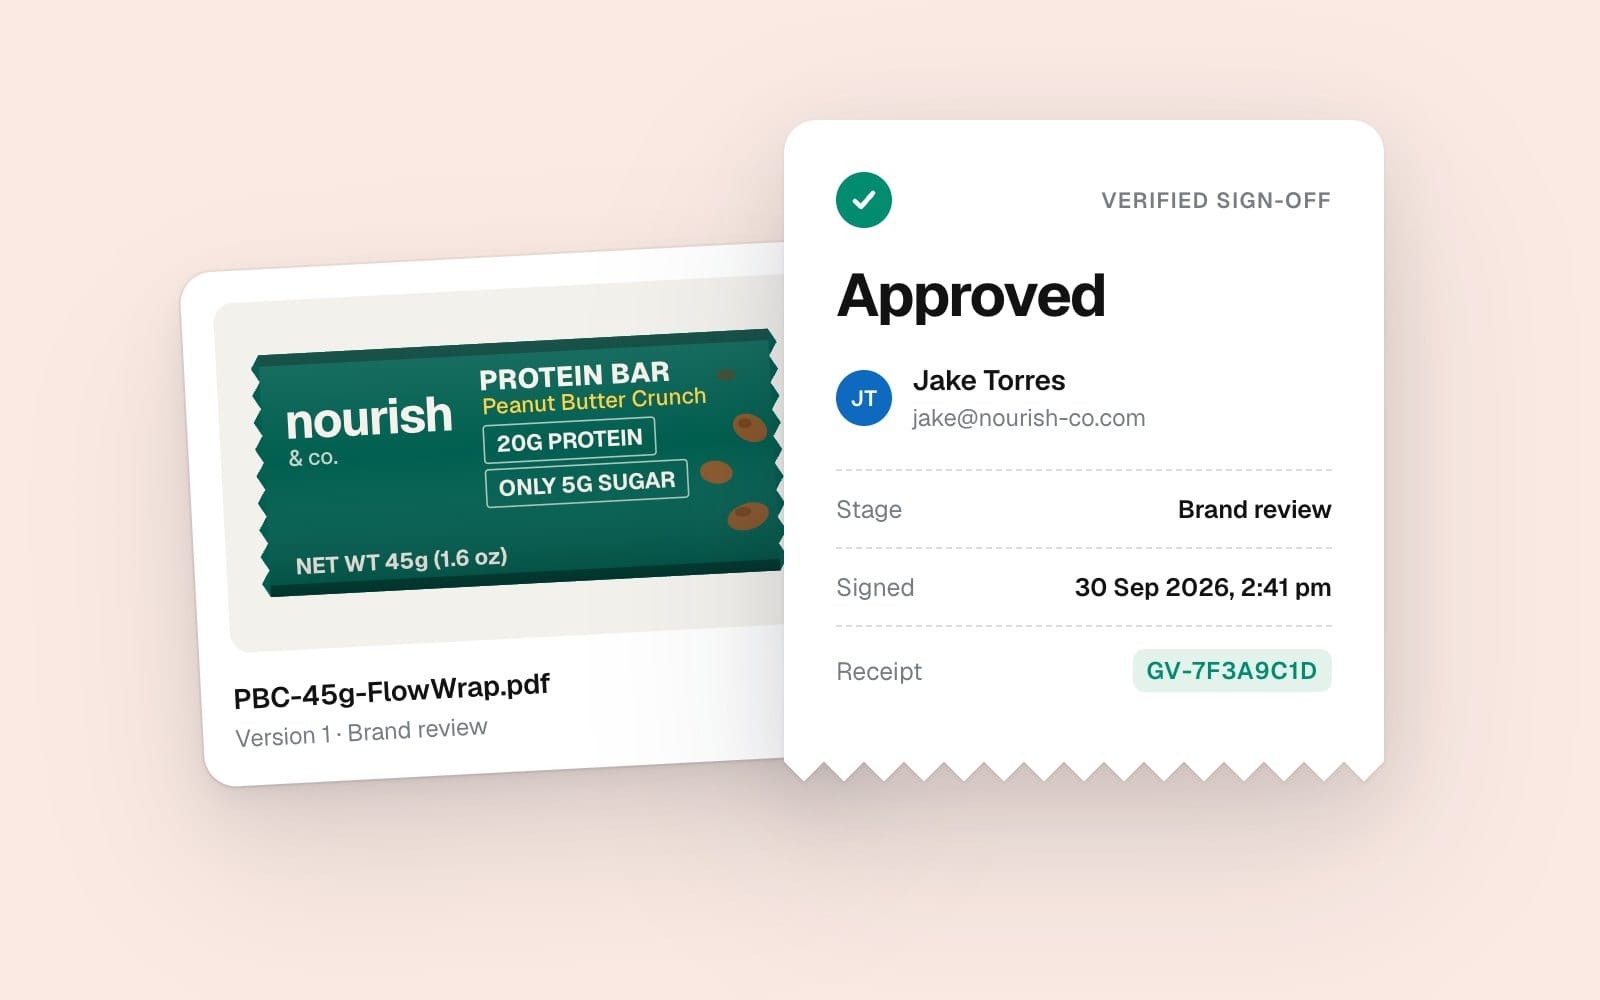
Give each stage one clear decision with batched review
Inside a stage, feedback can still arrive as a drip of single comments. Each one pings the designer.
Batched review fixes that. It's in GoVisually's web app from November 2026, where it's switched on for your team. It works like a code review:
- Draft as you go. Write a comment and click Save & add more instead of Post. The comment is saved as a draft. Nobody is notified yet.
- Keep reviewing. Your drafts collect in the sidebar under "Your pending review". Only you can see them.
- Submit once. Click Submit review. Add one summary, then pick one verdict: Comment, Approve or Request changes.
- The team gets one notification. All your comments publish together, with your summary and verdict, as a single update.
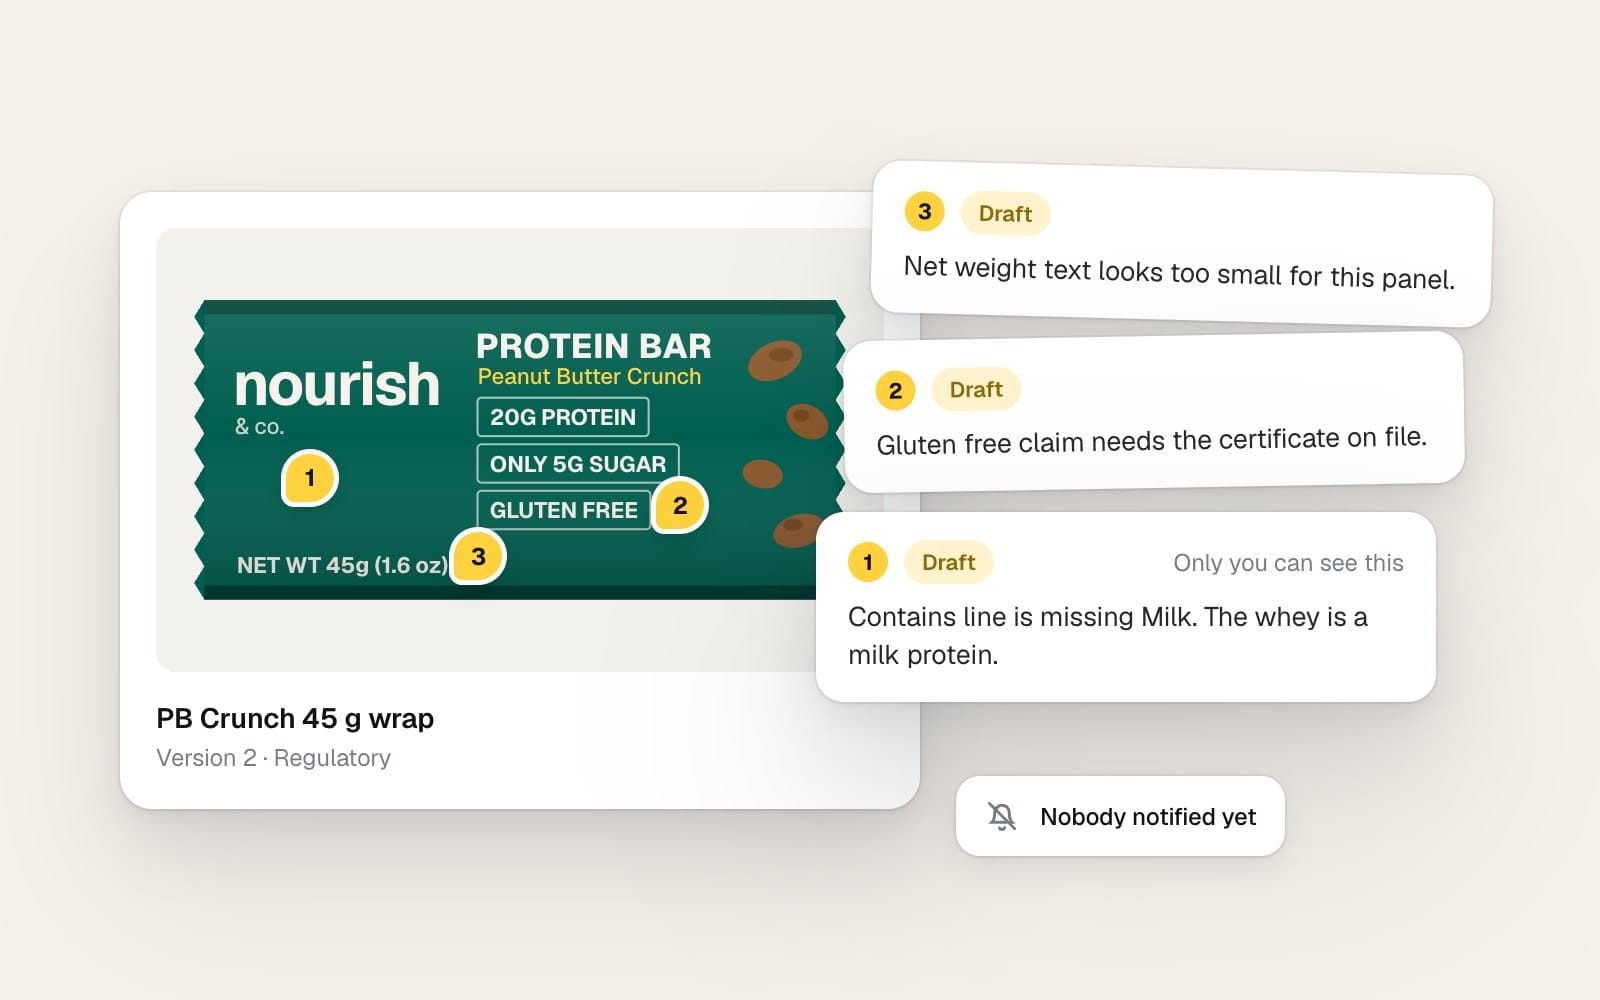
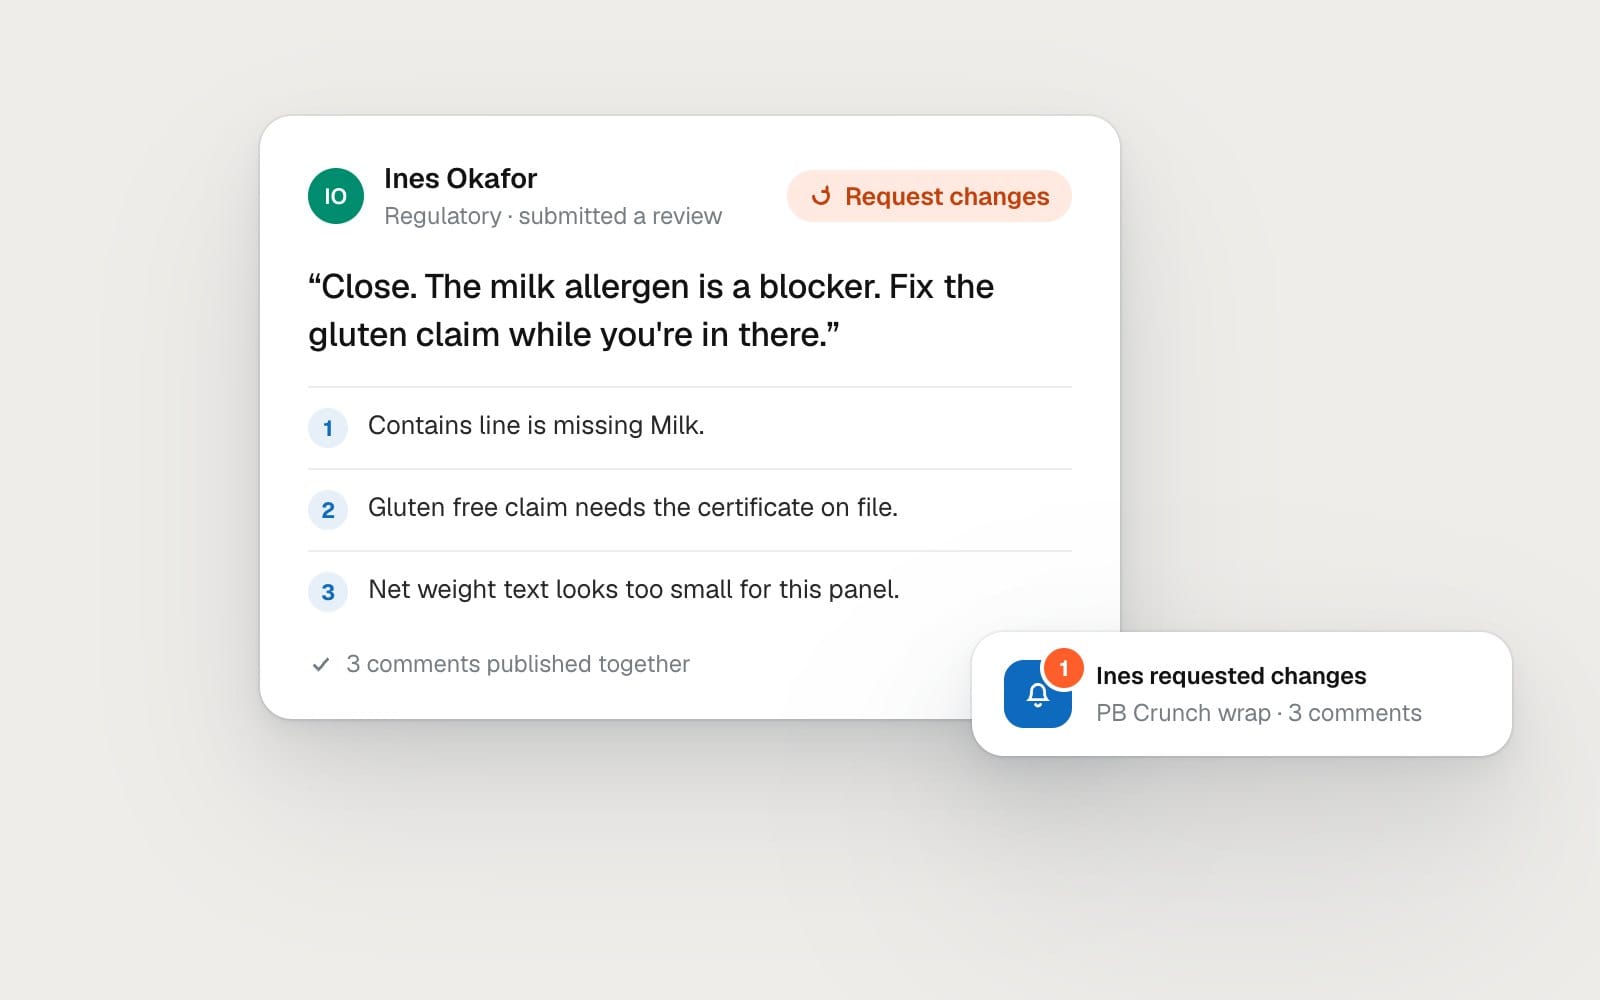
This pairs well with stages:
- The regulatory reviewer can read the whole panel, then send one clear "request changes" with every issue listed.
- If the stage has a checklist, the submit screen uses it, so the approval still goes through that stage's checks.
- If it isn't your stage's turn, your review still posts, but as comments only.
- Submitting is all or nothing. If it fails, nothing is published and your drafts are kept.
A few limits to know. Replies always post straight away; only new comments can be drafted. Guest reviewers who aren't signed in can't batch. And drafts are private until you submit.
Keep the record: the decision log
When a retailer or auditor asks who approved a label, you want an answer in seconds. The decision log lists every stage start, approval, change request, new revision and skip, with the receipt ID for each sign-off. You can export it.
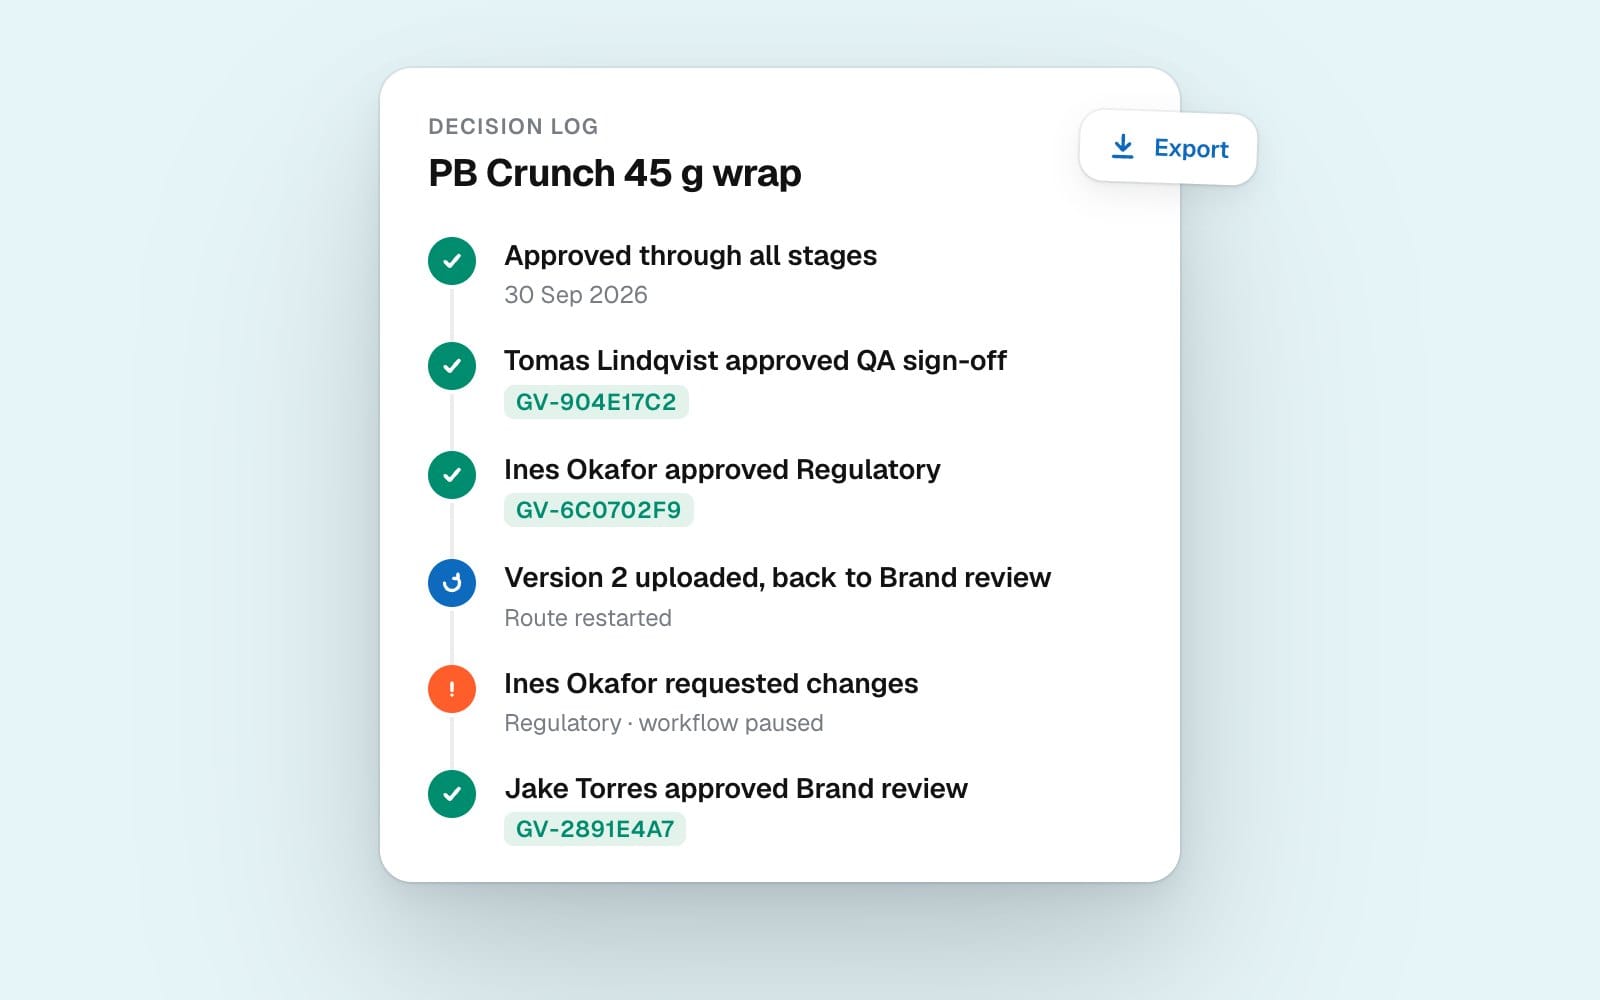
Tips that keep the workflow fast
- Check print readiness before QA. Run the file through a free PDF preflight check so QA isn't sending it back for bleed or RGB images.
- Compare the printer's proof to the approved file. The print proof compare tool shows text changes side by side.
- Use the same route for every SKU in a range. It makes multi-SKU packaging reviews far easier to track.
FAQs
What is an artwork approval process?
It's the set order of reviews a label or pack file must pass before it's printed. It's also called an approval workflow. Each step has named approvers, and the file only moves on when that step approves. For packaging, it usually runs brand, regulatory, QA, then printer.
What are the steps in the packaging artwork approval process?
Most CPG teams use four: brand review, regulatory review, QA or prepress sign-off, and printer sign-off. Some add a legal stage for new claims, or a retailer stage for private label.
Who should approve packaging artwork?
Brand approves the design and copy. Regulatory approves claims, allergens and mandatory panels. QA approves that the file matches the spec and will print. The printer confirms the files and returns a proof. Give each stage one accountable person.
What should an artwork approval checklist include?
Split it by stage. Brand checks the name, design and copy. Regulatory checks ingredients, allergens, the nutrition panel, claims and net quantity. QA checks the barcode, print readiness and dieline fit. The printer stage confirms the exact file and returns a proof.
Should reviewers approve in sequence or in parallel?
Run the stages in sequence, so each one checks a settled version. Inside a stage, reviewers can work at the same time. You then choose whether everyone must approve or the first approval is enough.
What happens when a reviewer requests changes?
The workflow pauses. The designer uploads a new version and submits it for review. It then restarts at stage one, so every stage approves the final file.
How long should artwork approval take?
It depends on the change and the market. Set a deadline per stage, measured from when the stage starts.
How do I prove who approved a label?
Use a tool that records each sign-off with the reviewer's name, email, time and the version they approved. In GoVisually, each approval gets a receipt ID in the proof's decision log, which you can export.
Multi-stage review workflows are on GoVisually's custom plans. Book a demo and we'll set up your brand, regulatory, QA and printer route on one of your own packs.
Disclaimer: This article is general information, not legal or regulatory advice. Rules and product features change, and we can get things wrong. Check the current rules with the relevant regulator or a qualified adviser before you print. Last checked: November 2026.