
Print proofing for packaging: how to check the printed pack against the approved artwork
Many errors that reach the shelf were right in the approved PDF. Here's how to catch what changes between approval and press.
Print proofing is checking a printed sample against the artwork you approved, before the full run ships. For packaging, that means a press check or first article inspection: you hold the first printed pack next to the signed-off file and confirm the text, layout, barcode and colour all match. You sign only when they do.
Most teams proof the PDF hard. That's the right instinct. But many of the errors that reach the shelf were right in the approved PDF. They changed somewhere between approval and press.
This guide covers where those changes creep in, a printable press-check checklist, and which check method catches what.
Why a correct PDF can still print wrong
Approval isn't the last time someone touches the file. After you sign off, the artwork usually passes through more hands:
- The designer exports a "final final" file and picks the wrong version.
- The printer's prepress team trims, traps and step-and-repeats it.
- Fonts get swapped or reflowed when they aren't embedded.
- A late fix (a new net weight, a new sodium value) lands in one file but not the other.
- Plates, cylinders or digital presets carry over from the last job.
- Colour drifts on press as the run warms up.
Each step is small. But a typo in the product name, a net weight that no longer matches the serving size, or a nutrient value that doesn't match its %DV is a recall risk once it's on shelf. So the question at the press check isn't "is this good artwork?" It's "is this the artwork we approved?"
Types of print proofs
A print proof is a sample you check before the full run. There are five main types. They go from fast and cheap to slow and exact.
| Proof type | What it is | Good for | Not good for |
|---|---|---|---|
| Soft proof | A PDF viewed on screen | Text, layout, version, barcode number | Colour, unless the screen is calibrated |
| Hard proof (digital proof) | A printed proof from an inkjet or laser proofer | Size, fold, type size, how the pack reads in the hand | Exact colour, unless it's colour-managed |
| Contract colour proof | A colour-managed hard proof made to a standard, such as ISO 12647-7 | The colour reference you and the printer both sign | Special inks, foils and the real material |
| Wet proof | Printed with real inks, often on the real material, on a proofing press | Spot colours, special inks, how ink sits on the material | Speed and cost; it needs plates or cylinders |
| Press proof | The first sheets or packs off the production press | The final check: real press, inks, material and finish | Late changes; fixing anything now is costly |
Two pairs get mixed up most:
- Colour proof vs contract proof: a colour proof is any hard proof made to show colour. A contract proof is one made to an agreed standard. It's the colour reference you both sign.
- Wet proof vs press proof: both use real ink. A wet proof is made before the run. A press proof comes off the production press at the press check.
Most packs need a soft proof for content and a contract proof for colour. Add a wet proof for a new material, metallic or special inks.
Press check and first article inspection
These two terms get mixed up too.
- Press check: inspecting the first sheets or packs off the press, in person or remotely, before the run continues.
- First article inspection (FAI): a formal check of the first finished item from production against the spec. In packaging, it's the first printed and converted pack, checked against the approved artwork and the dieline.
A contract proof answers "what should the colour look like?" The press check answers "does the real print match the approved file and that proof?" You need both.
The press-check checklist (printable)
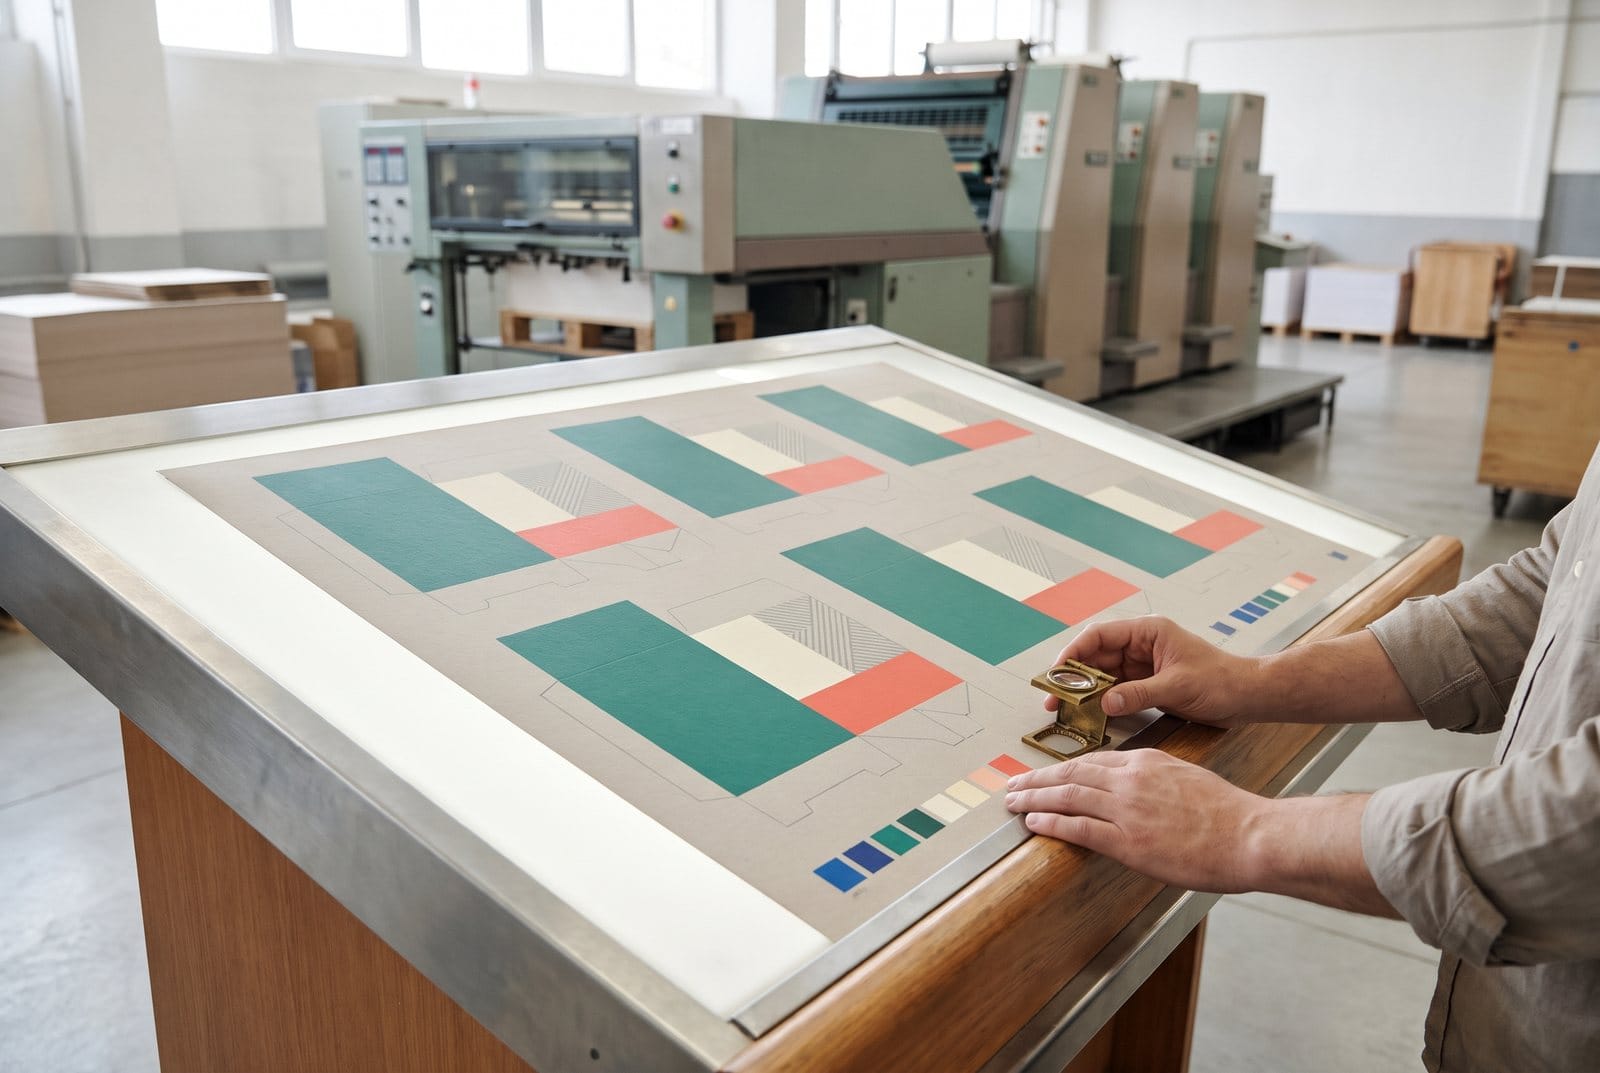
Bring the approved artwork, the contract proof and this list. Check one pack from the start of the run, and pull another later in the run.
- Confirm the version. Match the job number, SKU and artwork version on the sheet to your approval record.
- Read the product name and flavour. Letter by letter. Spelling changes hide in big type.
- Check the net quantity. Compare it with the approved file and with the serving size on the panel.
- Check the nutrition or supplement facts panel. Every value and every %DV. Make sure each %DV still matches its value.
- Read the ingredients and allergen statement. Order, spelling and bolding.
- Check every claim. "Gluten free", "high protein", certification marks. Each must be the approved wording.
- Read the small print. Footnotes, address, country of origin, storage and usage lines.
- Check the barcode. Scan it. Then grade it with a verifier if the retailer requires a grade.
- Check the lot and date area. Make sure the space for coding is clear and in the right place.
- Check colour against the contract proof. Under a standard light booth (D50), then measure key colours with a spectrophotometer.
- Check register and print quality. Look for misregister, hickeys, banding and filled-in small type.
- Check the cut and fold. Trim, bleed, glue flap and panel positions against the dieline.
- Compare the sample with the approved file. Use a side-by-side overlay, not memory.
- Record the result. Sign, date and photograph the approved sample. Keep it with the approval history.
Steps 2 to 7 are where people miss things. Your brain fills in what it expects to see. That's why step 13 matters.
What each check method catches
No single method catches everything. This table shows what each one is good for.
| Method | Catches | Misses | Best used for |
|---|---|---|---|
| Eyeball (side by side) | Big layout changes, missing panels, obvious colour shifts | Single-character changes, swapped digits, small type | A first look at every pack |
| PDF compare (file vs file) | Every text change, moved or deleted objects, swapped images | Anything that happens on press | Checking the printer's file against your approved file |
| Photo compare (print vs file) | Visual differences between the printed pack and the approved file: changed regions, missing or moved elements | Measured colour. It also can't compare text, because a photo has no text layer | The press check or first article, when the pack is in your hand |
| Spectrophotometer | Colour difference (ΔE) against the target or contract proof | Text, layout and content | Brand colours and colour-critical runs |
| Barcode verifier | Barcode grade (ISO/IEC 15416), quiet zones, bar width | Everything else on the pack | Retailer compliance before the run ships |
Be clear about one thing. A phone photo can't measure colour. Light, camera and white balance change the colours in every shot. If colour is the question, use a spectrophotometer and a light booth.
Step one: compare the printer's file with your approved file
Many errors are already in the file the printer sends back. Catch them before plates are made.
Ask the printer for the final print-ready PDF. Then compare it with your approved version. You can do this for free with the Print Proof Checker. It puts two PDFs side by side and flags text changes.
Before that, run the file through a PDF preflight check to catch RGB images, missing bleed and fonts that aren't embedded. And if you need to rebuild the code, the free barcode generator makes UPC and EAN artwork.
Step two: compare the printed pack with a photo
Once the pack is printed, there's no PDF to compare. There's a physical object. That's where the GoVisually photo compare comes in.
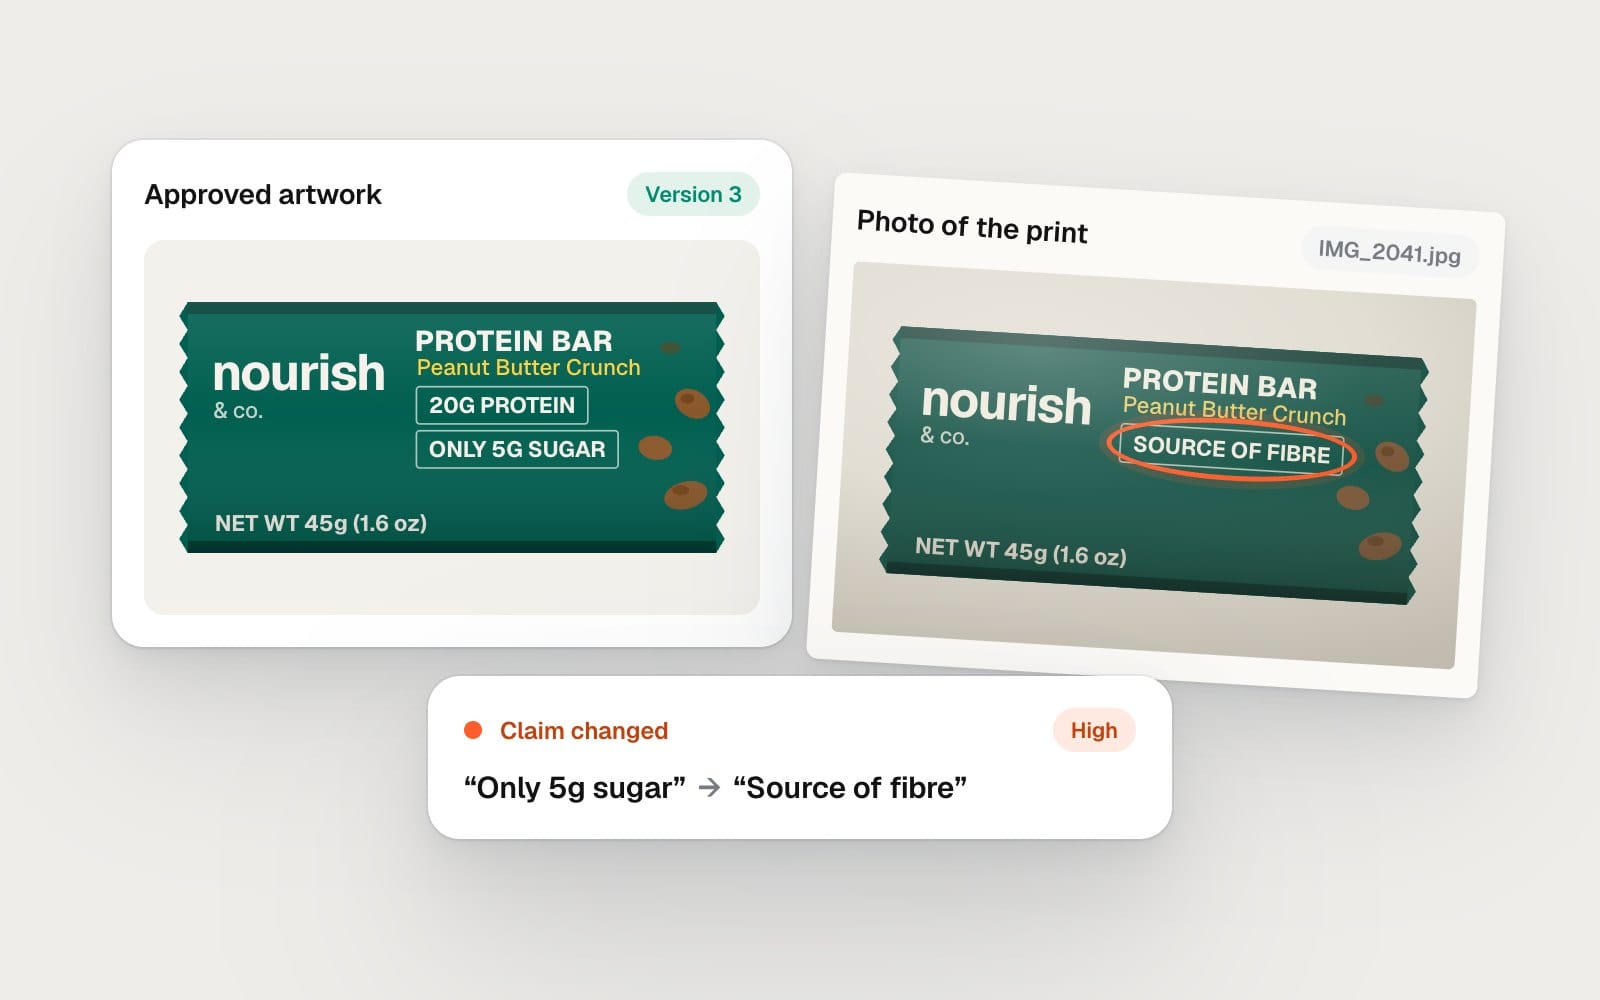
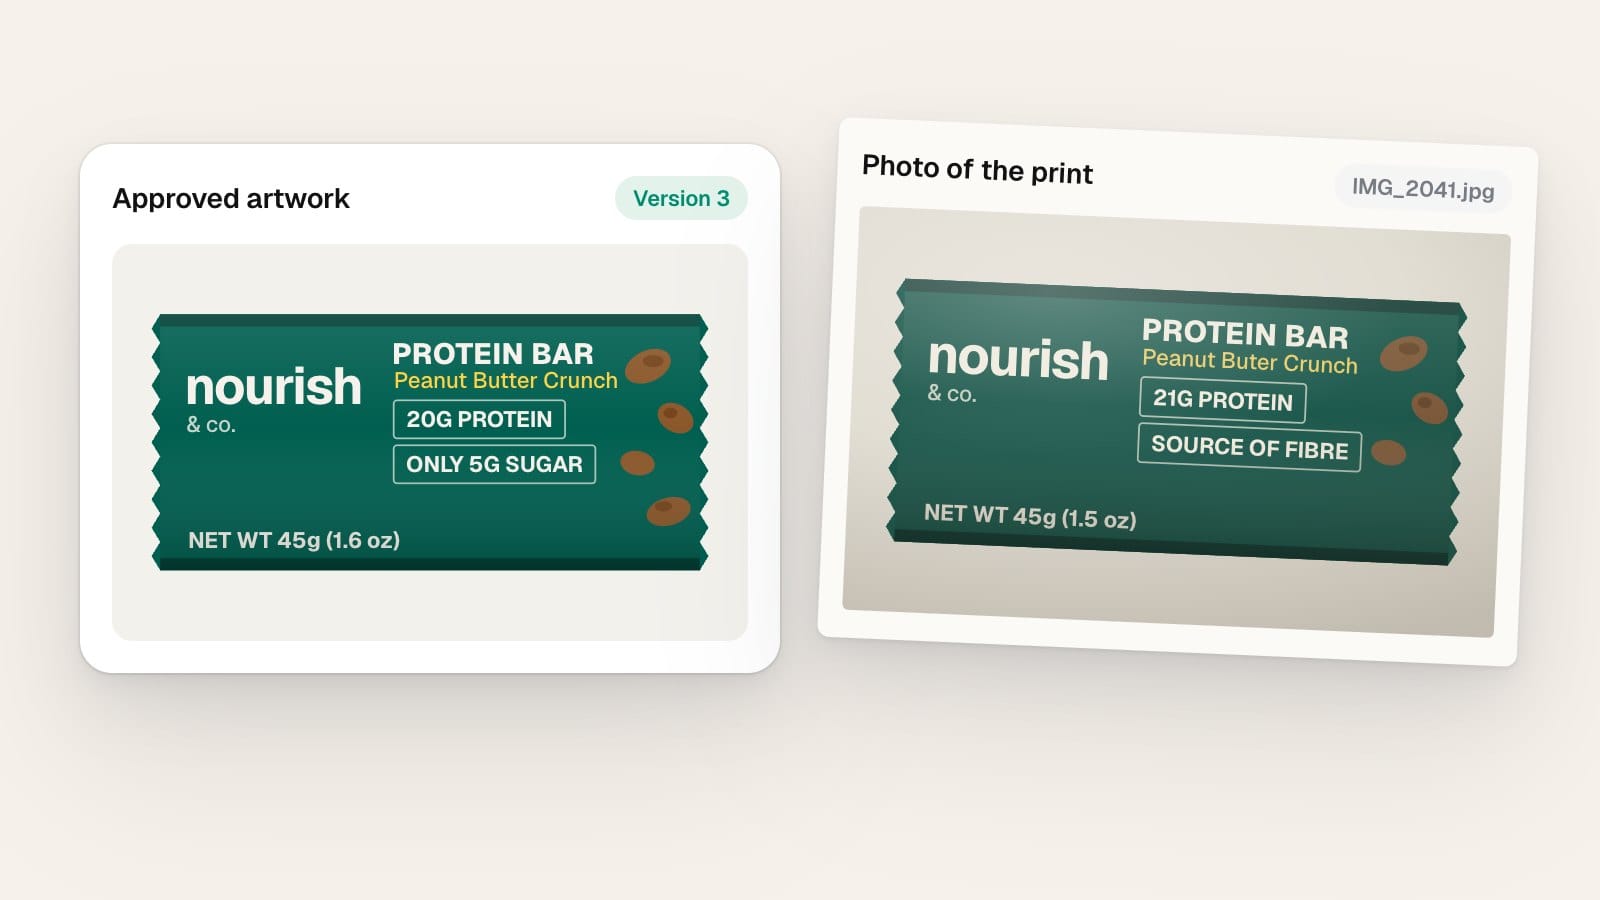
Photo compare is part of AI Smart Compare and is available on selected plans. You start by choosing what you're comparing:
- two versions of a proof
- a proof against a file you upload
- a proof against a photo of the print
For the photo option, you pick the approved proof and upload a photo of the printed sample. That could be a signed hard proof, a sheet pulled at a press check, or a filled pack. GoVisually lines the photo up with the artwork before it looks for differences. For a photo of a curled or stretched print, you can turn on "Correct for curl and stretch". It bends the proof in small pieces to fit.
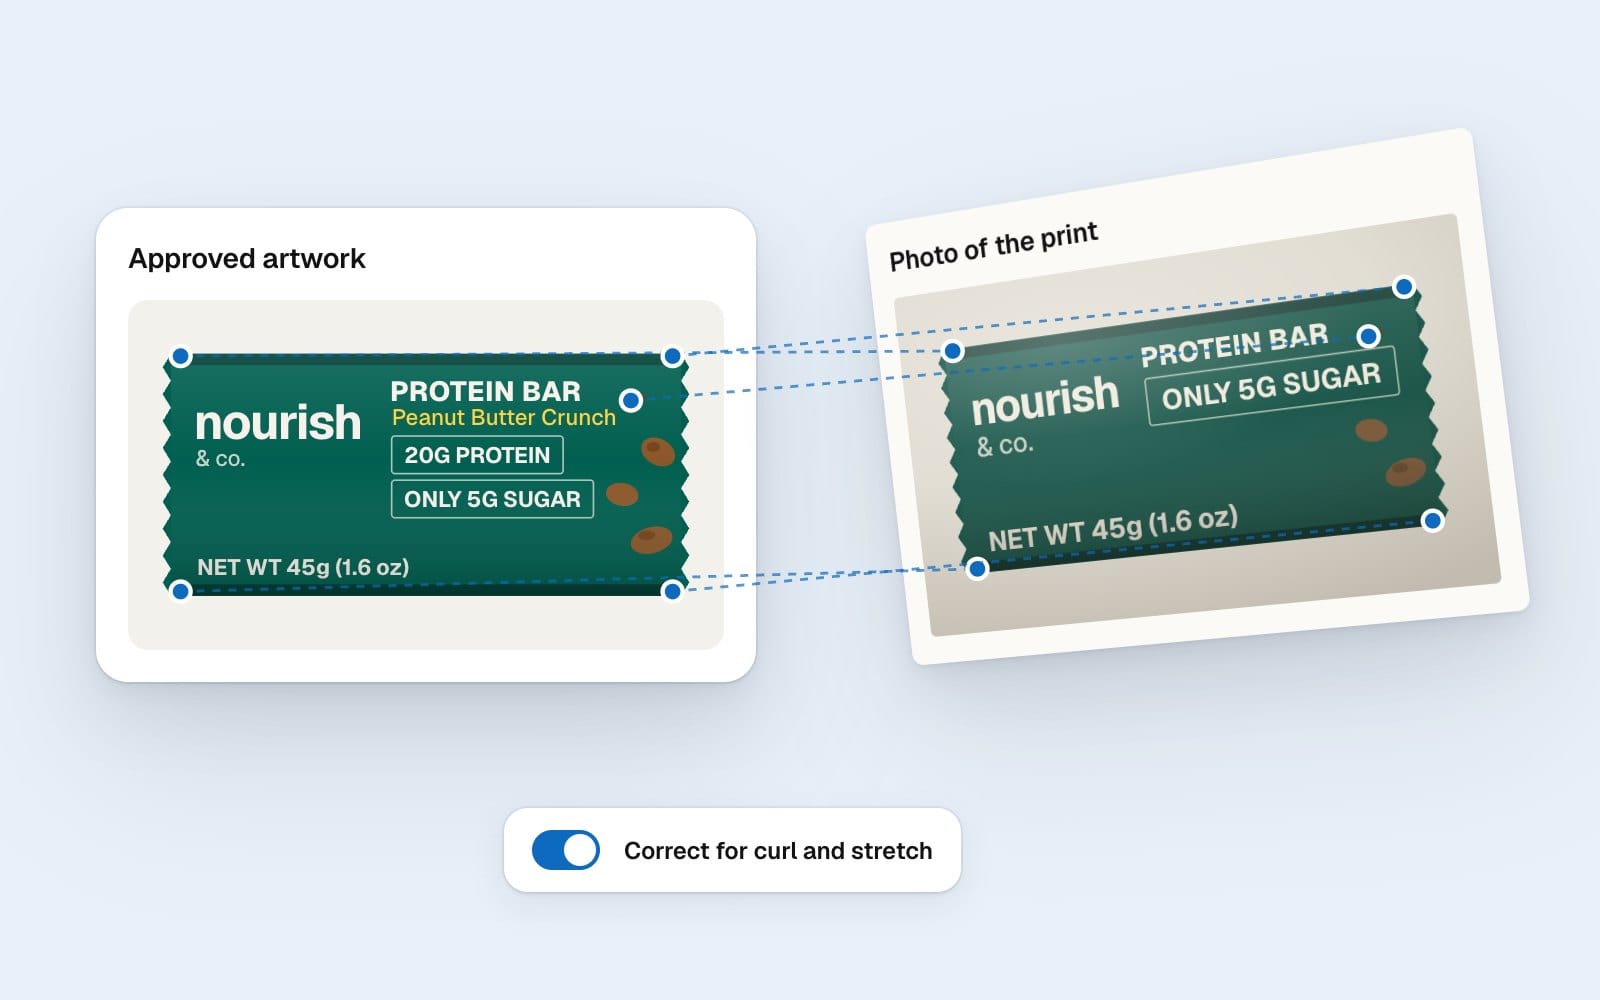
Then you review the result in the view that suits the job:
- Side by side for a first look.
- Overlay to fade one on top of the other.
- Difference to light up the areas that don't match.
- Swipe to drag a divider across the same spot, before and after.
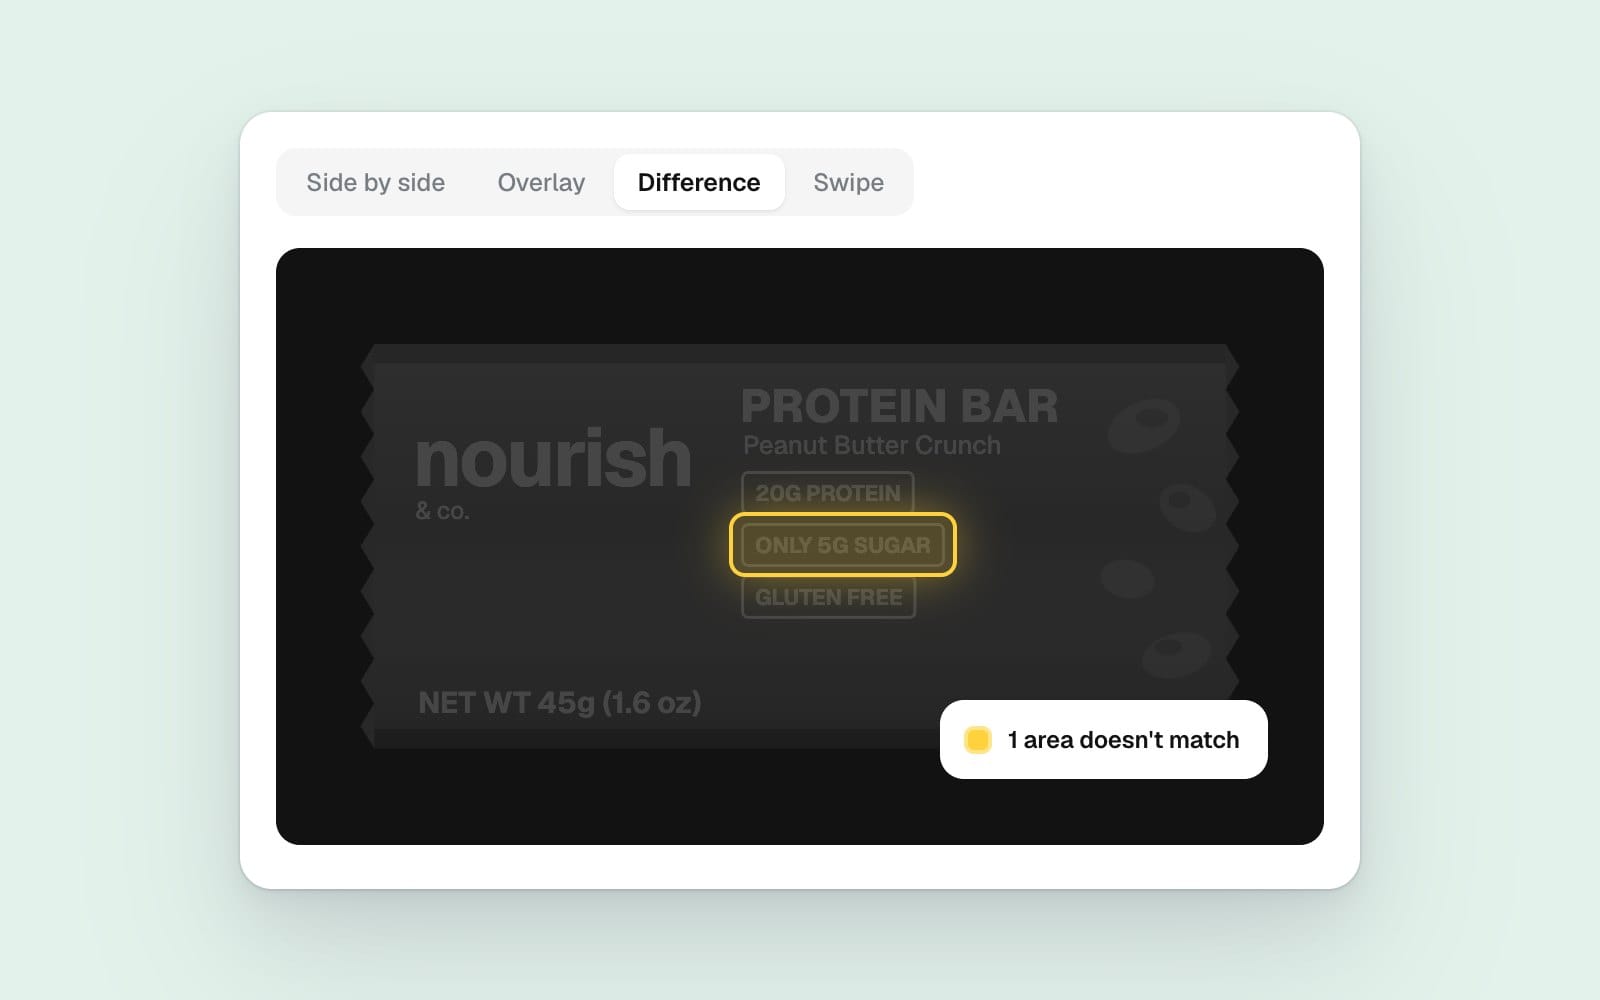
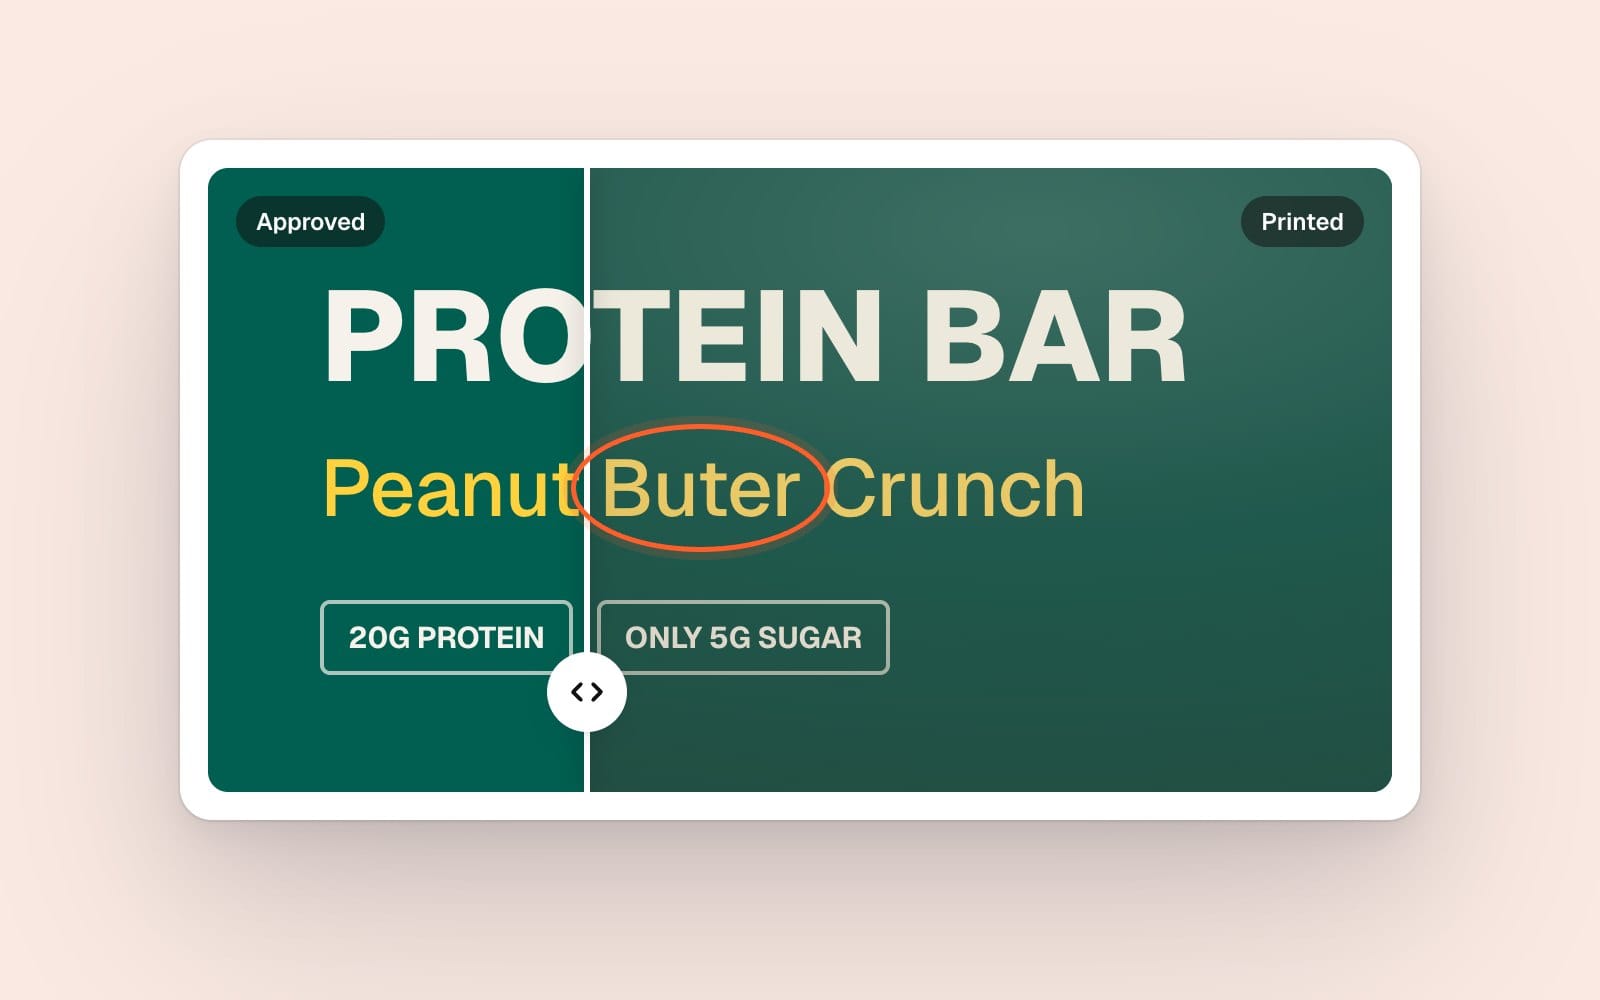
Here's what the photo compare doesn't do, so you can plan around it:
- It doesn't read text on a photo. When one side is an image, GoVisually says plainly that text comparison isn't available. It shows you where the pack differs. You read those areas and decide.
- It doesn't measure colour. Use a spectrophotometer for that.
- It doesn't grade the barcode. Use a verifier.
For the best result, shoot the whole pack in frame, flat and evenly lit. Avoid glare on gloss or foil.
Every difference it shows is something to check. People make the call. Record the decision on the proof, so the approval history shows what was checked and who signed.
A simple routine for every print run
- Approve the artwork in your proofing tool, with every reviewer signed.
- Compare the printer's print-ready PDF with the approved version.
- At the press check, run the checklist above.
- Photograph the first pack and compare it with the approved proof.
- Measure colour and grade the barcode with the right instruments.
- Sign, photograph and file the approved sample.
This fits into a wider artwork approval checklist. It also catches the panel errors covered in our guide to common Nutrition Facts formatting errors, after the panel has been printed.
FAQs
What is a press check in printing?
A press check is when you inspect the first printed sheets or packs as they come off the press. You compare them with the approved artwork and the contract proof. The run continues only after you sign off.
What should I look for at a press check?
Check the version, every piece of text, the nutrition panel, claims, barcode, colour against the contract proof, register and print quality, and the cut and fold. Use a written checklist, so nothing depends on memory.
What are the types of print proofs?
The main types are soft proofs (a PDF on screen), hard or digital proofs (printed on a proofer), contract colour proofs (made to a colour standard and signed as the reference), wet proofs (real inks, often on a proofing press) and press proofs (the first sheets off the production press).
What is the difference between a colour proof and a contract proof?
A colour proof is any printed proof made to show colour. A contract proof is a colour proof made to a standard, such as ISO 12647-7, that you and the printer agree the press will match. It's the colour reference for the job.
What is first article inspection in packaging?
First article inspection is a formal check of the first finished pack from production. You compare it with the approved artwork, the dieline and the spec before the rest of the run is released.
What is the difference between a soft proof and a hard proof?
A soft proof is a digital file, usually a PDF, that you view on screen. A hard proof is printed. Soft proofs are fast for checking content. Hard proofs are needed to judge colour and finish.
Can I check print colour from a phone photo?
No. Lighting, the camera and white balance all change the colour in a photo. A photo is good for finding content and layout differences. To check colour, measure it with a spectrophotometer under standard light.
How do I compare a printed label with the artwork?
Take a flat, evenly lit photo of the whole label. Then use a photo compare tool, such as AI Smart Compare in GoVisually, to align it with the approved file and show the differences. Read each flagged area yourself and decide.
To compare your next printed pack with its approved artwork, see how GoVisually handles artwork review and compare.
Disclaimer: This article is general information, not legal or regulatory advice. Rules and product features change, and we can get things wrong. Check the current rules with the relevant regulator or a qualified adviser before you print. Last checked: November 2026.